Tuesday 28 October 2014

Escape From Monkey Island - Part 1

Welcome back to a new installment of gaming walkthroughs on my blog, GuardianGamerOfTheGalaxy. So far, we have covered The Curse Of Monkey Island and Grim Fandango - two brilliant games brought to us, the puzzle crazed gamers, by the genius of LucasArts Entertainment. In turn, what better way to complete a trilogy of LucasArts game walkthroughs then to go onto their last ever game, Escape From Monkey Island! I hope you enjoy reading this walk through as much as the previous two. In this game, we welcome back Dominic Armato as the voice over for the newly married Guybrush 'Marley' Threepwood.

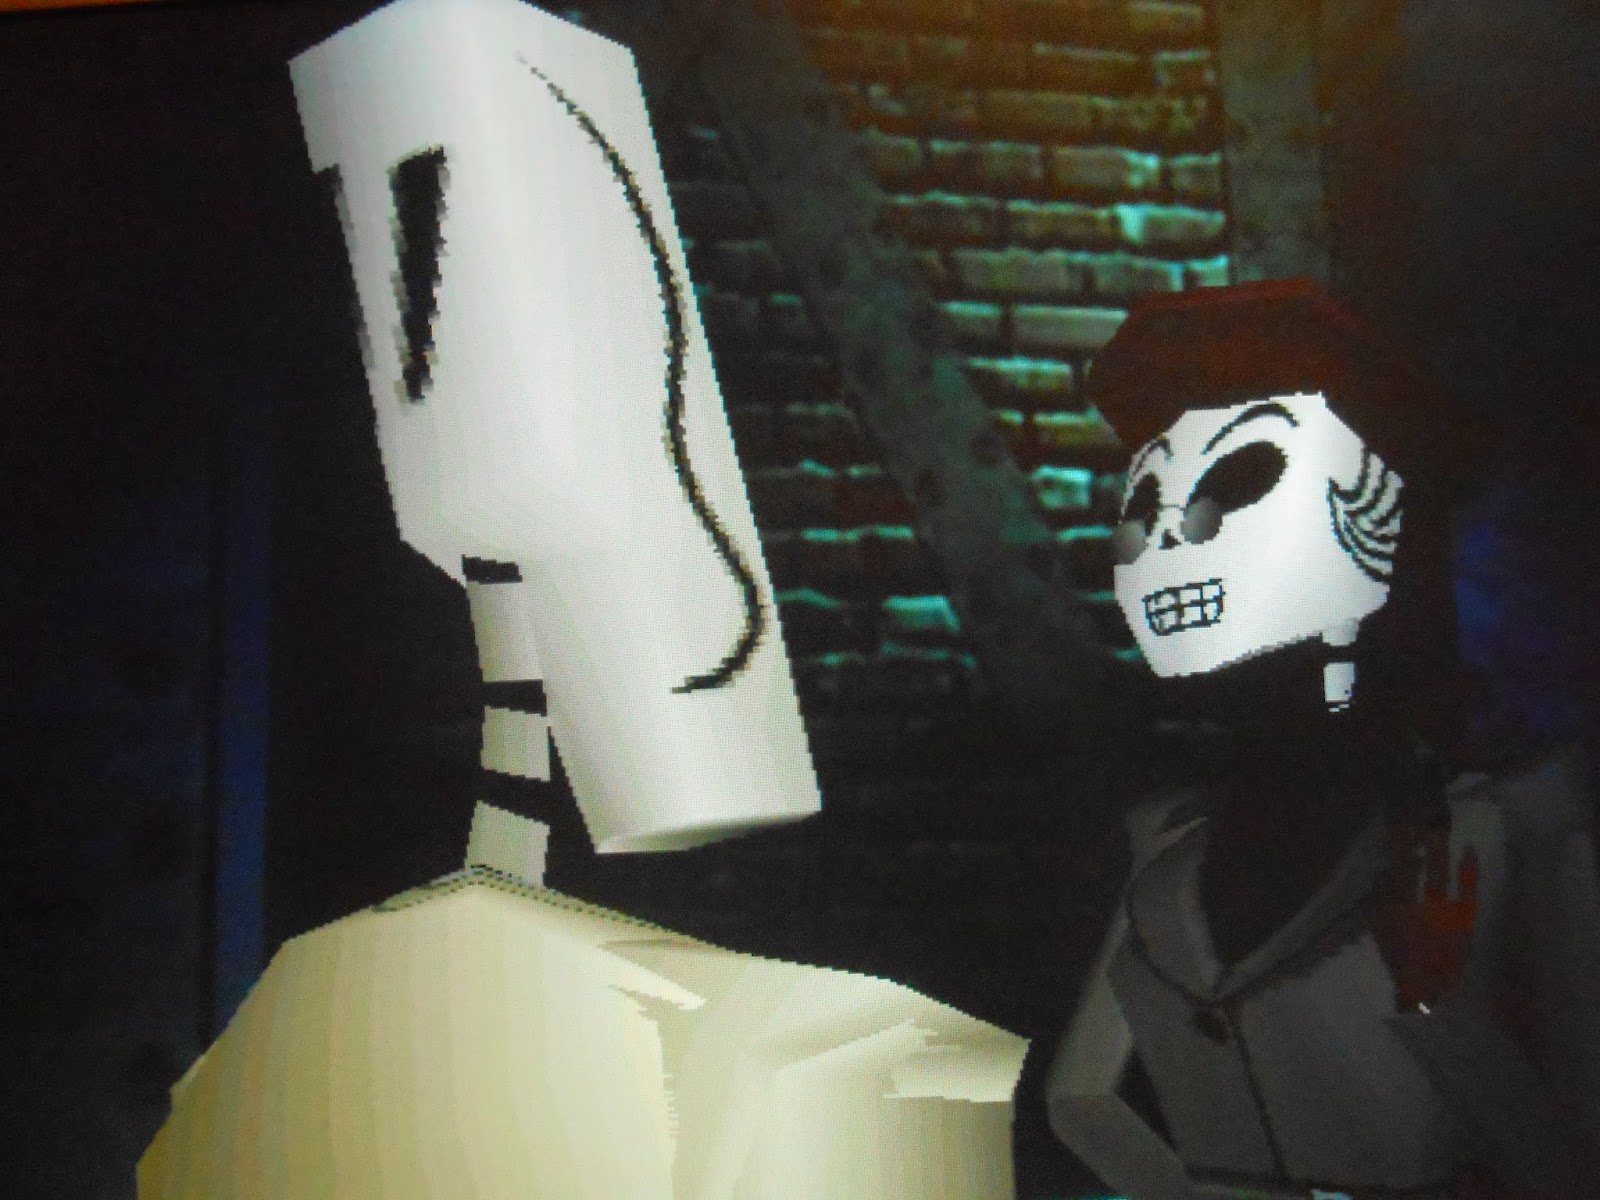
In the cutscene to open up the game, Guybrush is reminiscing on the good times, defeating LeChuck in the previous Monkey Island games and finding the 'love of his life' Elaine - otherwise known as 'plunder buddy'. Guybrush reminisces for too long and you find out he is tied to the mast of a ship whilst Elaine battles with pirates. Trouble already? There's always trouble brewing in one form or another whenever Guybrush is involved.

'The only thing duller than my sword was my wit' - Guybrush Threepwood (circa 2000)

----------------------

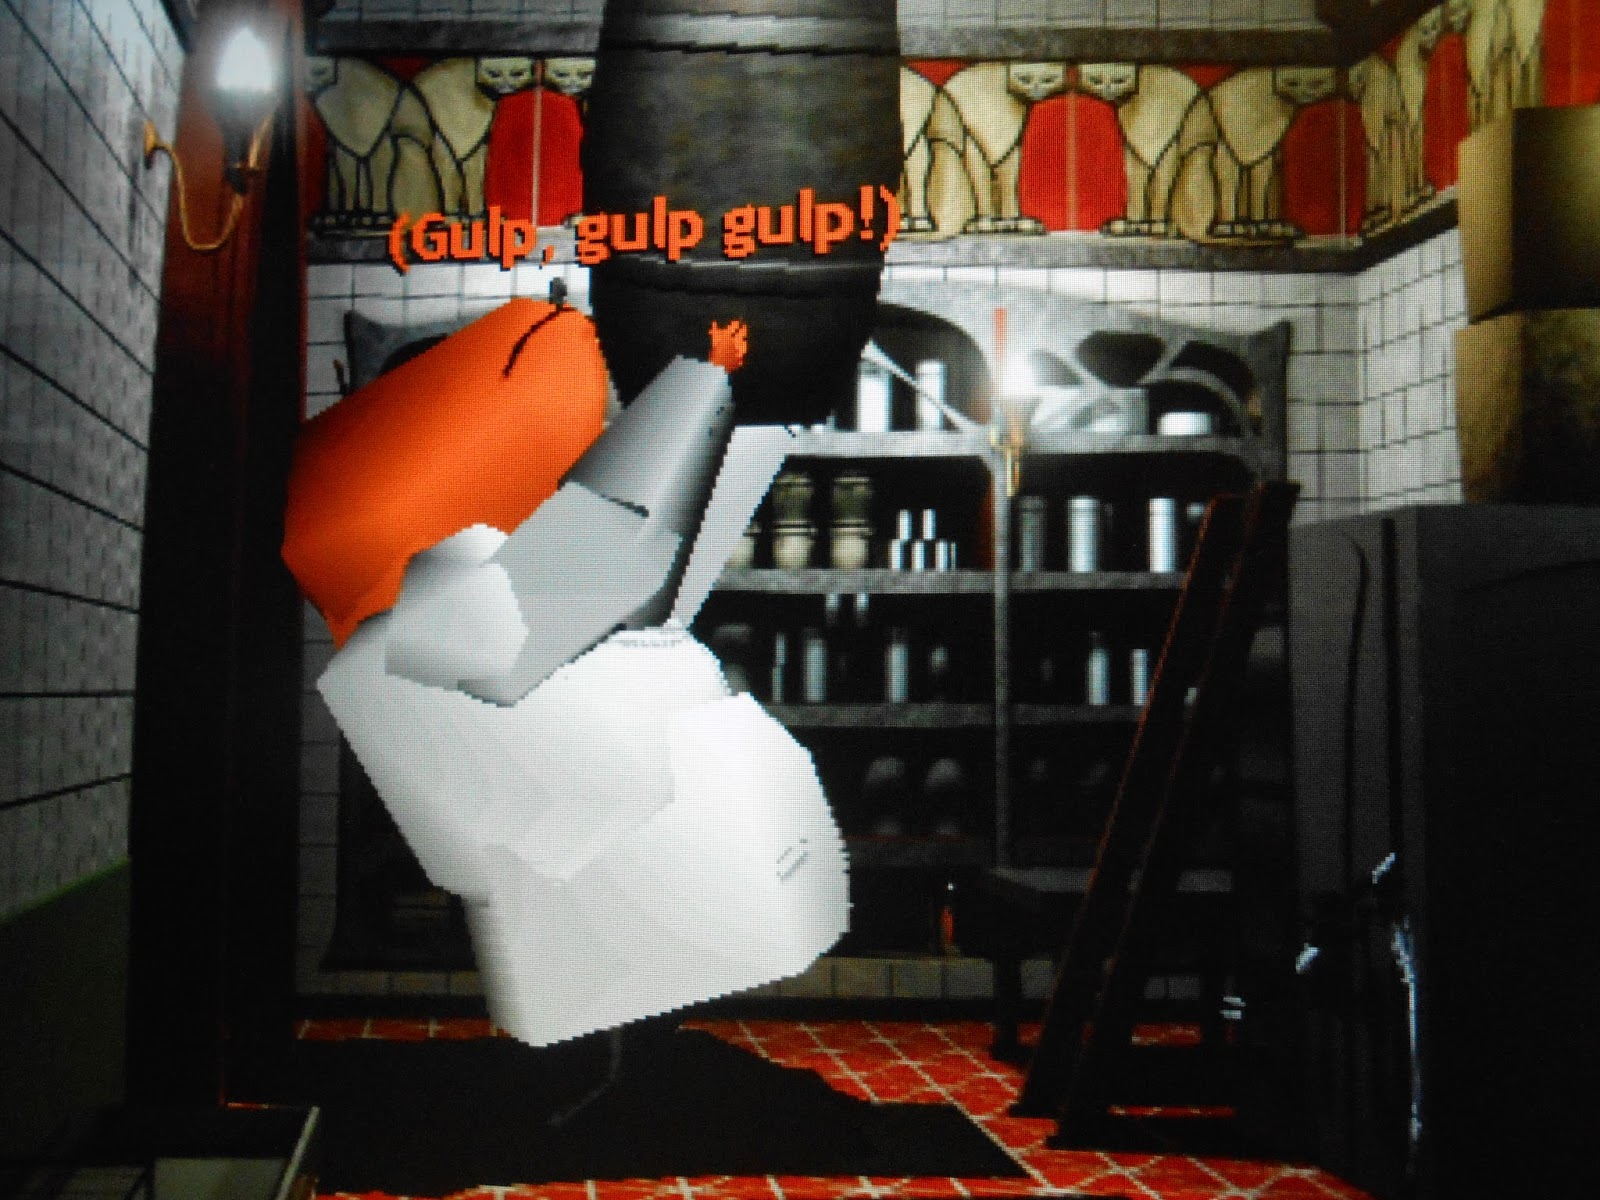
Now that the cutscene is over, you are welcomed with a screen filled with nothing but Guybrush, a brazier full of hot coals, a cannon ready to fire, and the crate to the ships hold. What you need to do is to kick the brazier of hot coals over (using 'U'), juggle one of the hot coals on your feet whilst you shift around to face the other side of the ship until the prompt on the bottom of the screen says 'Kick red hot chunk o' coal at loaded cannon'. To pick up the hot coal, press 'P'. Move around to the other side of the mast using the directional buttons. This results in a huge cannon being shot through the adjacent ship. Guybrush and Elaine are victorious.


Cutscene to their return to Melee Island and Elaine is not looking forward to the large welcoming party that will be on the docks upon their arrival. However, all is not as it was on Melee Island and not a single person welcomes Elaine and Guybrush back apart from Timmy the Monkey who appears to be warning them both about something that has happened up at the Governor's Mansion.

There you find a man firing rocks at the mansion as he is under contract to do so as the Governor (Elaine) is 'dead'. You find out through talking to him that he can only hit the cactus (seen on the right hand side of the mansion) and that the only way to stop him firing the catapult would be to give him some snacks. In turn, you need to find a way to make the catapault need re-aligning, something rubbery to attach to the cactus to fling the boulder back, and snacks. In addition, Guybrush needs to find a way to Lucre Island to talk to lawyers to get the contract scrapped. Simple enough!

Or in Guybrush's words: 'Stop the insanity. Check'


Walk towards Melee Town. Enter the 'International House of Mojo' where the Voodoo Lady you met in Curse Of Monkey Island is. Pull the finger on the hand shaped table so that the Voodoo Lady appears. It seems she has an 'unbreakable five game deal with LucasArts' so that is why Guybrush can't seem to shake her off... She states how you'll need to find a ship, crew and a navigator (found in the Scumm Bar) before you can go to Lucre Island. She also exclaims how Melee Island has become so empty because of a mysterious overseas investor buying up all of Melee Island. Now you have all found out all you can do from the mysterious Voodoo Lady.

If you head to the left of the screen, you will be shown to a map of Melee Island. To the top left, you have the Governor's Mansion, to the top right you have a Meathook's House of Wax, to the bottom right you have the dock, and the bottom left you have Melee Town.


If you head to the right of the screen, you will reach the town hall. Outside the town hall you will meet Otis and Carla, two thirds of Guybrush's original crew he took to Monkey Island. The other third of Guybrush's crew was Meathook. Once you talk to both of them, you find out that they hold a pretty big grudge against Guybrush for leaving them on Monkey Island; so much so that Otis has resorted to petty thievery, or as he likes to call it: 'pro-active redistribution of wealth'. The only way to convince them to join your crew again is to get them contracts for cushy government jobs.

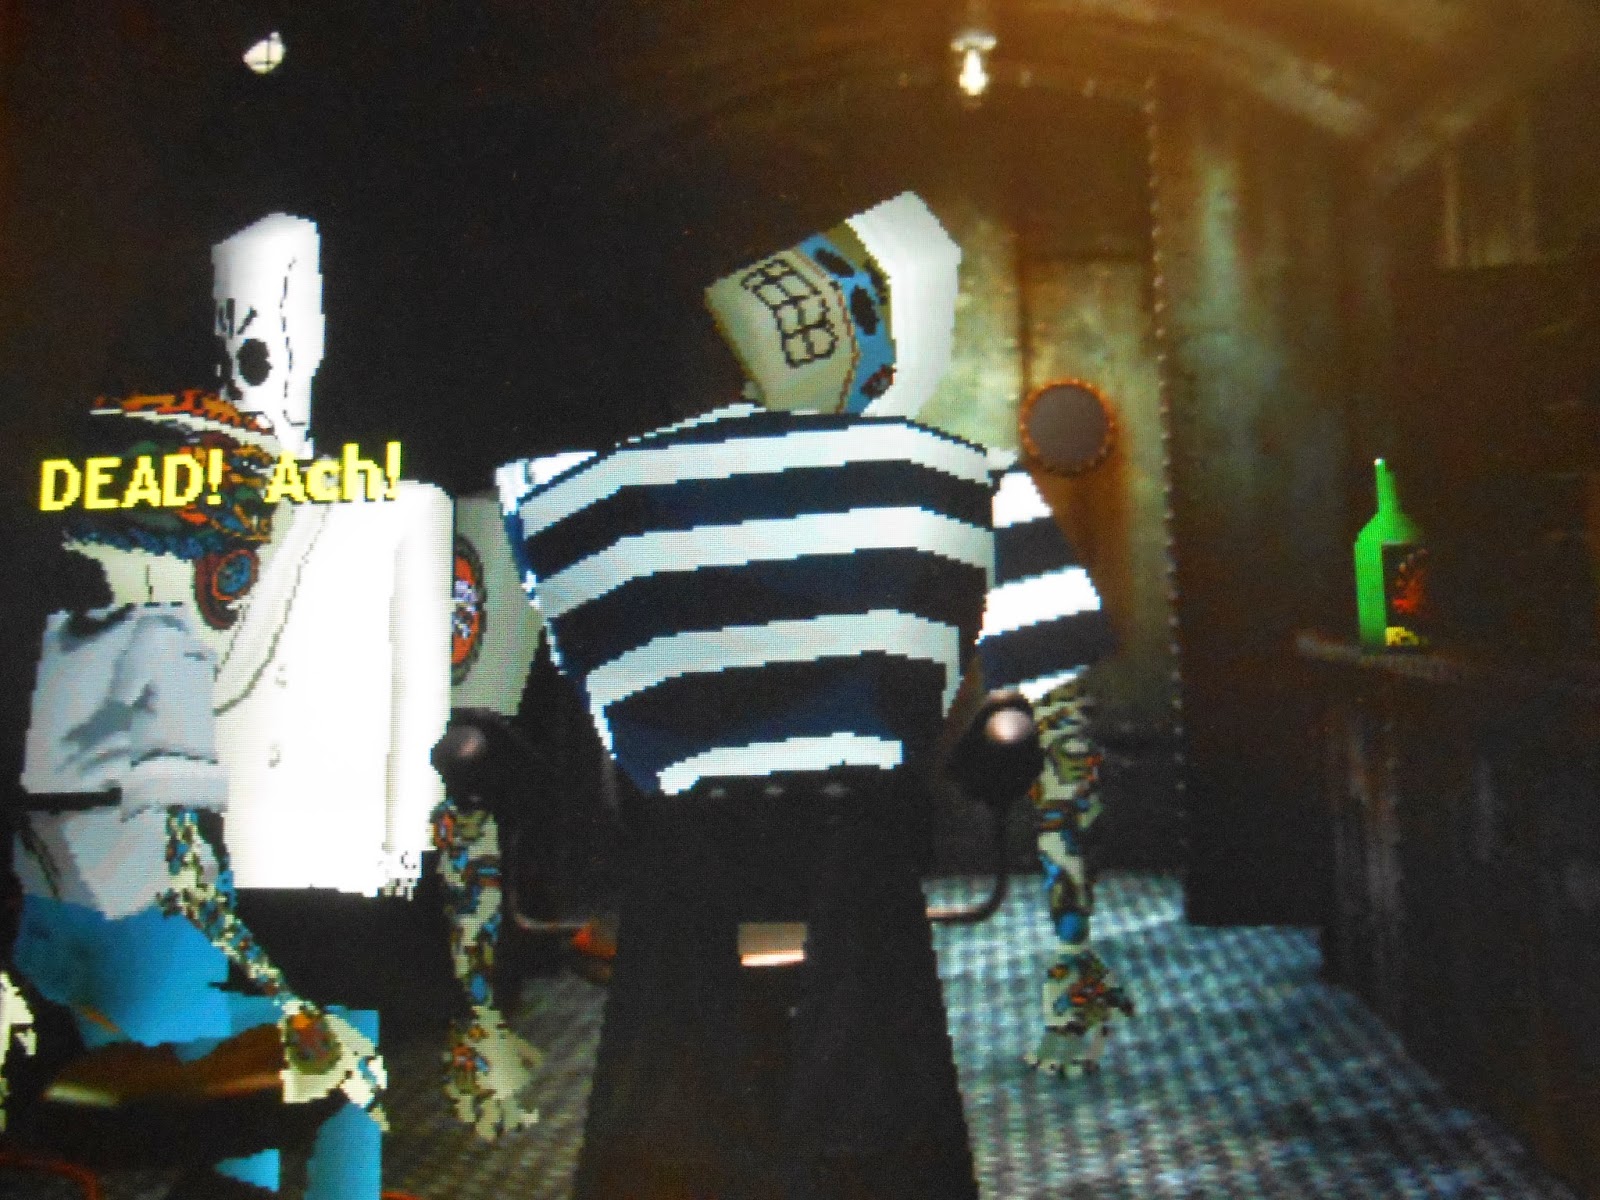
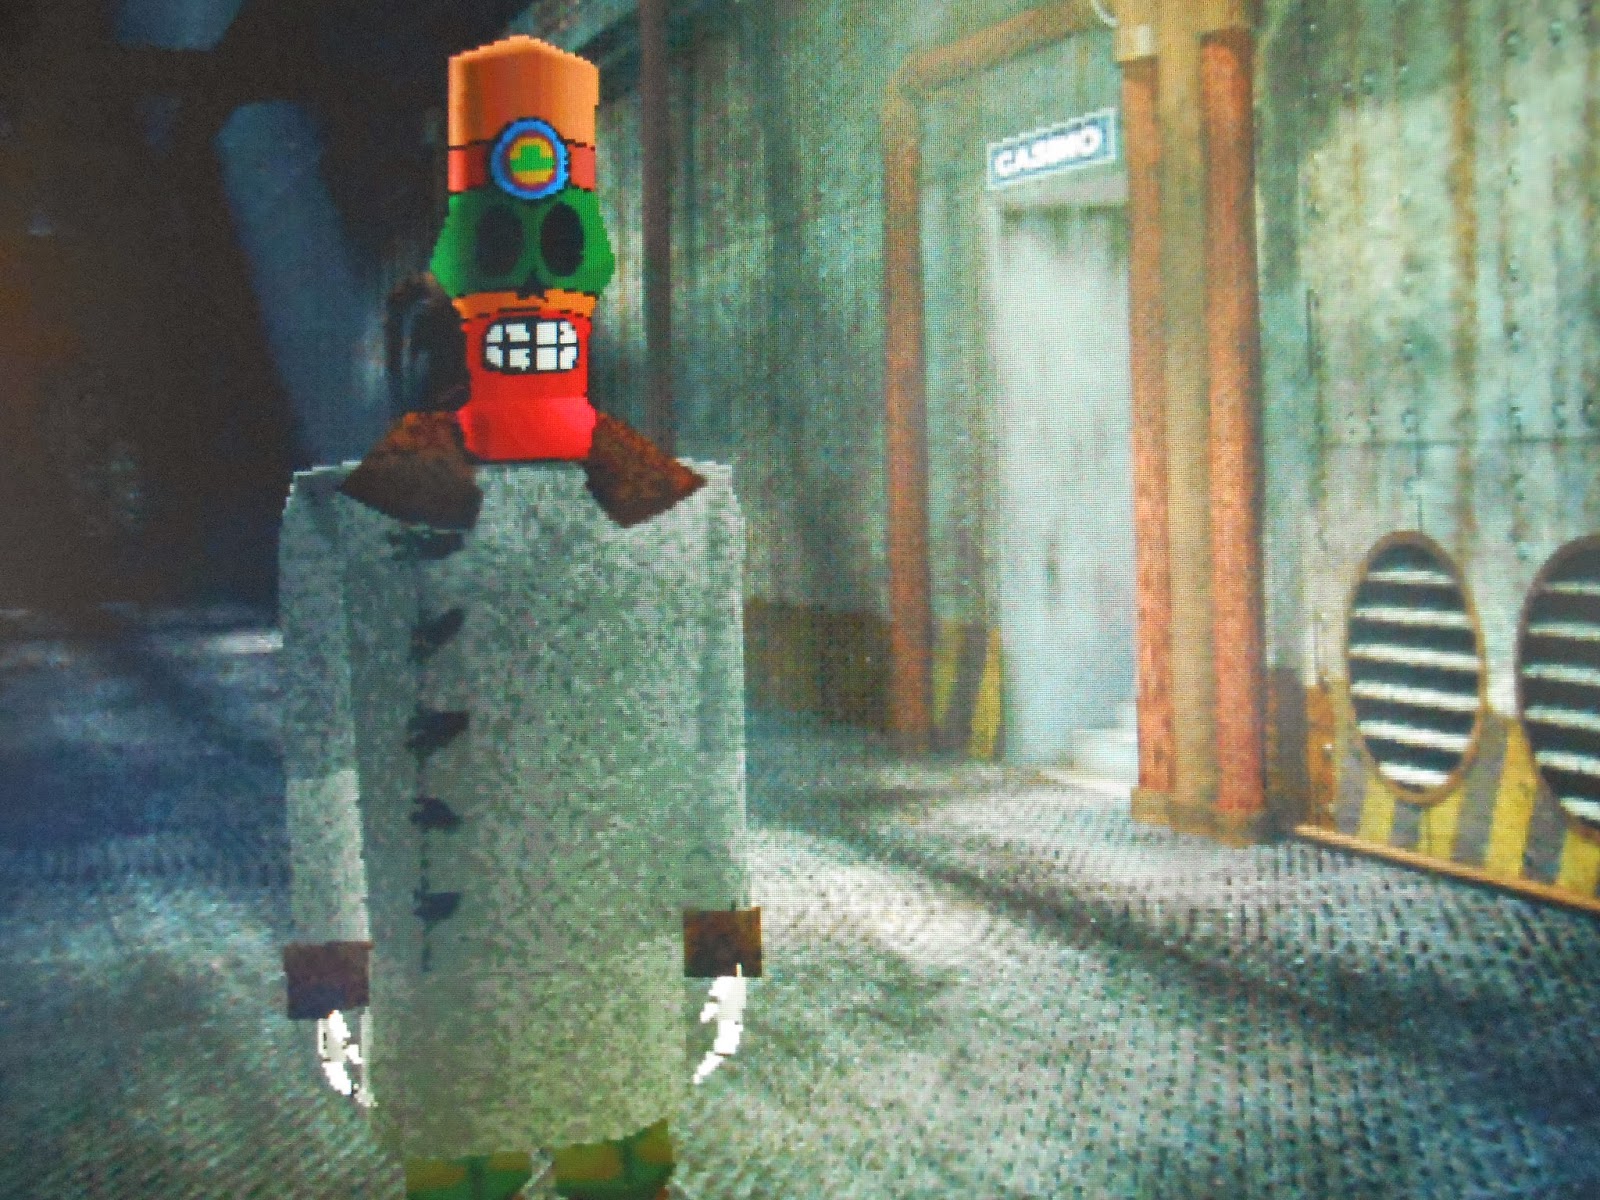
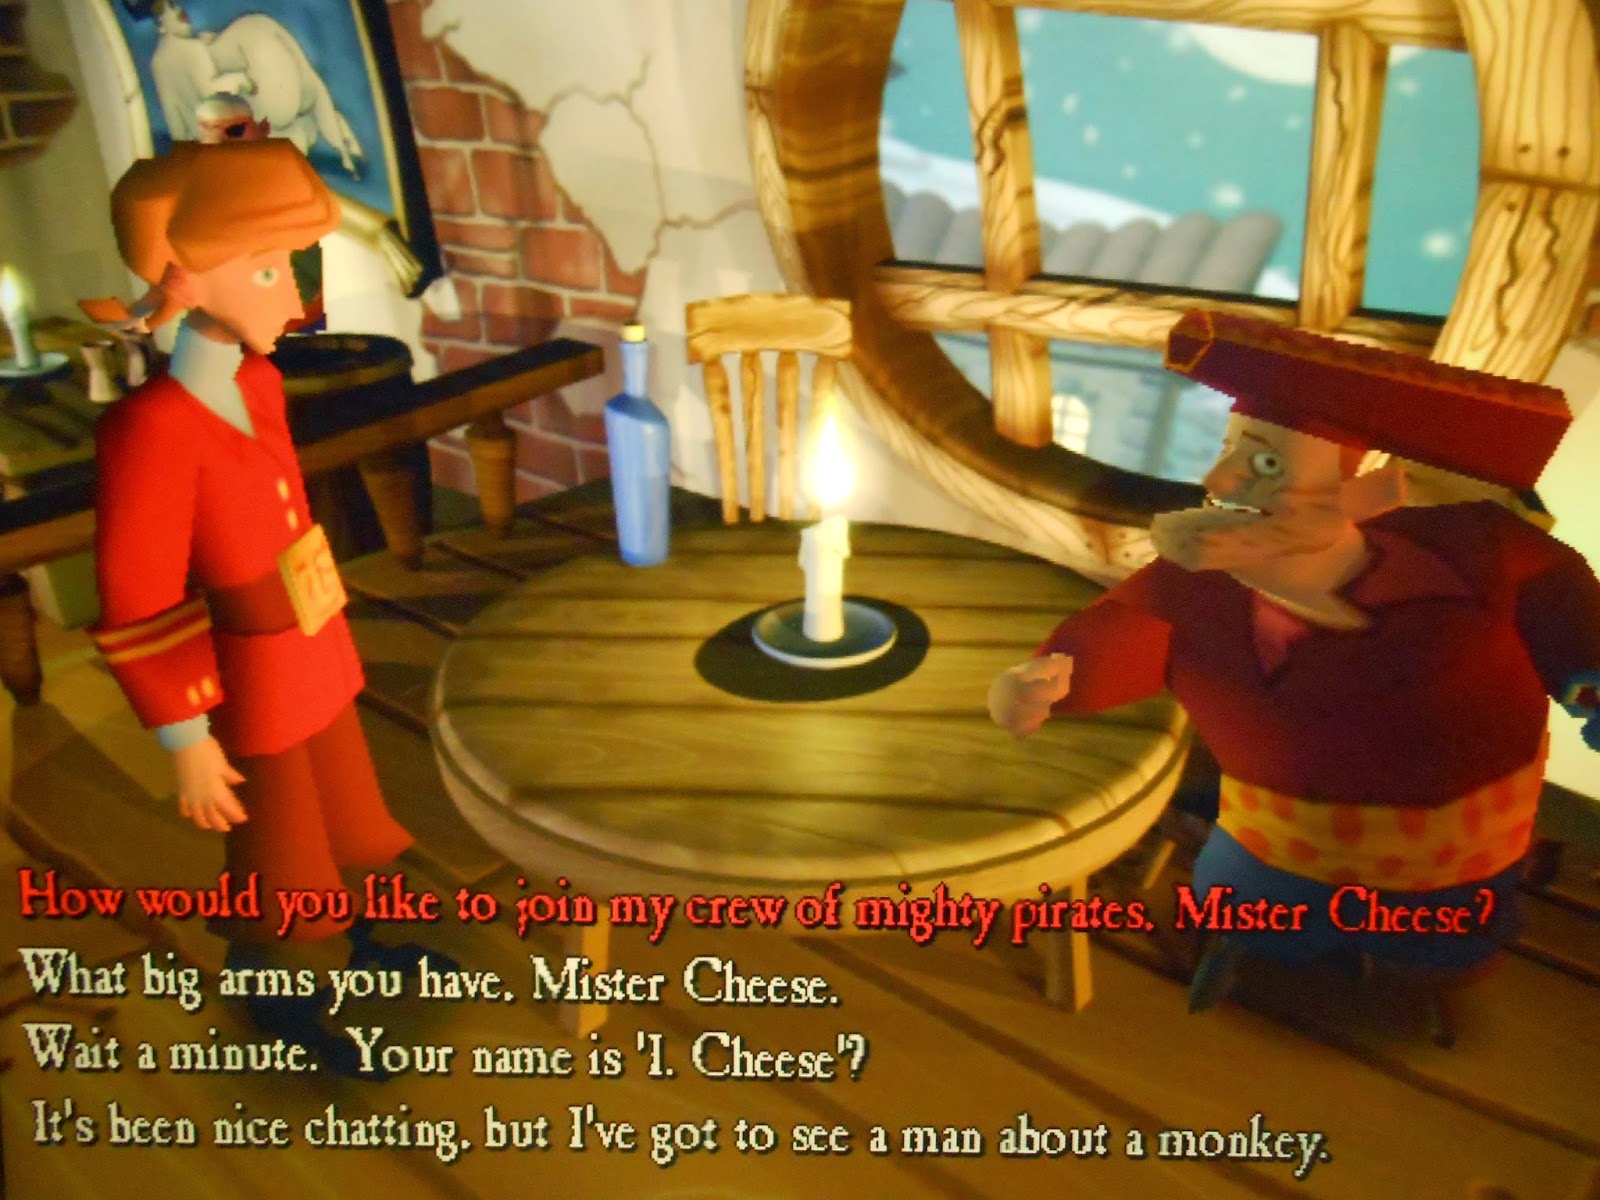
Carry on walking to the right from the town hall and you will reach Scumm Bar. In the front part of the bar you have two pirates playing darts and a very scarred bartender. In the back, you have two elderly folk, one whose birthday it is and another who it turns out is a navigator. You will need to beat this Ignatious Cheese in an Insult Arm Wrestle match to get him on your crew. It turns out that he is also the owner of the Scumm Bar and won't join Guybrush's crew because he doesn't want to leave it. Insults, gibes and mockeries are the curse of the bewildered pirate on Melee Island it seems.


Retorts and Insults used to beat Ignatious Cheese in Insult Arm Wrestling:

Today, by myself, twelve people I've beaten - From the size of your gut, I guess they were eaten

I'm going to put your arm in a sling - Why? Are you studying to be a nurse?

I've got muscles in places you've never even heard of - It's too bad that none of them are in your arms

My ninety-eight year old grandmother has bigger arms than you! - Yeh but we've both got better bladder control than you do

Give up now, or I'll crush you like a grape! - I would if it would stop your WINE-ING

You're the ugliest creature I've ever seen in my life - I'm shocked that you've never gazed at your wife

Your arms are no bigger than fleas that I've met - So that's why you're scratching... I'd go see a vet

My stupefying strength will shatter your ulna into a million pieces - I'm surprised you can count that high

Hey, look over there - Yeah, yeah I know, it's a three headed monkey

Your knuckles I'll grind into a splintery paste - Ugh, I thought the bean dip had a strange taste

Do I see quivers of agony dance on your lip? - It's laughter that's caused by your feathery grip

People consider my fists leathal weapons - Sadly, your breath should be equally reckoned

Only once have I met such a coward! - He must've taught you everything you know

I've out-wrestled octopi with these arms - I'm sure that spineless creatures everywhere are humbled by your might

My forearms have been mistaken for tree trunks! - An over the counter defoliant can help with that problem

--------------------------

Once you have got yourself a navigator for your trip to Lucre Island, through out-witting Ignatious Cheese, head over to the table opposite him. If you try and take some of the pretzels on the table, the man drunkenly retaliates. You need to find something to pop the birthday balloon. Talk to the dart players and convince them to hit the balloon in the corner of the room. Now go and pick up the pretzels. Now head back to the Governor's Mansion.

Once there take the popped inner tube out of your inventory (to do this, press 'I' to open up the inventory and then press 'P' to keep hold of the item once out of the inventory. To combine items in your inventory, press 'U' and move across to the item you want to combine it with). Use the tubing on the cactus and then head back to the man throwing rocks at the house. Give the pretzels to the catapult operator and whilst he is away, tinker with the catapult. This will make him recalibrate the catapult to the cactus. This leads to the catapult falling off the edge of the cliff and Elaine coming back to state that she is still 'dead'.


Then, upon noting how there was only one person running for mayor of Melee Island, a man who goes by the name Charles L. Charles, a posh 'man of the people', Elaine says how she needs to run against Charles L. Charles and that Guybrush needs to find a way to get to Lucre Island.

Go inside the mansion now. Pick up the government contract for a cushy job on top of the chest of drawers on the left of the window. This can be used to convince Otis and Carla to once more join Guybrush's crew. Now go to the table where Elaine is working and pick up the other government contract. Now get Elaine to sign them both. To get the action line to go down to 'Give government job contract to Elaine', press the 'Page Down' or 'Page Up' button. Now you have two signed contracts ready for Otis and Carla! Head down to hand the ordinary contract to Otis and Carla. They reject this one so hand them the cushy government contract instead. This gets you an additional two members for your crew!

Talk to Elaine regarding your problems in getting a ship and she will give you the Gubernatorial Symbol of Melee Island to show that you have a level of authority on the island.

Head down to the dock. By the grog machine you will find a 'popped inner tube' - pick this up. Remember how you need to deflect one of the rocks back towards the catapult? This will be handy for attaching to the cactus. Next, talk to the 'lady of leisure' about possibly lending Guybrush a ship. However, you will need more than the Guybrush charm to go about commandeering a ship. You need to prove that you have the 'authority to recquisition a ship' and you will have your ship. Hand the gubernatorial symbol to the harbour mistress. You now have your ship; otherwise known as the Dainty Lady! Now Ignatious Cheese, Carla and Otis join you and you set sail to Lucre Island.

----------------------

LUCRE ISLAND

Walk up the stairs just past the fish stall towards the 'Bait Shoppe'. Pick up the duck outside the shop. Guybrush somehow manages to fit the duck into his Mary Poppins esque trousers! Guybrush doesn't allow you to go into the shop before you take him to the Law offices first. Head towards the left of the screen until you get to the main town centre where you will find a fountain, the Hall of Justice, House of Sticks and a very effeminate man selling 'Scents and Sensibilities'. Carry on to the left of the screen until you are presented with the Law office of W.T.D, Lucre Bank and the Palace of Prostheses. Head into the Law Office.


Cutscene to Guybrush getting questioned by the judges of the Tri-Island Area. They say they cannot help Guybrush at the moment but do give him a letter from Grandpa Marley. Read this letter. It shows how there is a chest in the Lucre Bank that contains a secret of The Ultimate Insult and the deeds to the Marley Mansion. Yours, Horatio Marley.

Now head to the Hall of Justice. On the floor is a tin of chicken grease, pick it up. In the cell, you see Otis. Talk to him and you find out that he was 'framed' for stealing flowers from some old guy.

Now go back to the Bait Shoppe. Guybrush will find the smell of putrid rotting fresh somewhat revolting initially. In the shop, pick up some of the free bait on the side and you can watch the termite circus do their tricks also. Talking to the owner of the shop doesn't help you much so once you have the free bait, leave the shop and head to the effeminate man selling perfumes. Pick up one of the empty spritzer bottles to the left of him. He is called Hugo and he pronounces colognes as Colog Knees! He tries to influence Guybrush into parting cash for perfume and sprays 'Eau de LeChuck' of which he describes as having an 'earthy' fragrance to it. Upon Guybrush asking whether Hugo missed being a pirate, he exclaims only the wind, wenches, grog, and decks covered with blood of Hugo's enemies. You can hear Guybrush giving out a miniature yelp.

Combine the rotting bait and the empty spritzer bottle and spray it in Hugo's face. You find out it is 'too dry to spritz' initially, so head to the fountain and fill it up with water. Head back and spray it in Hugo's face. It has no effect on Hugo so you will need to add more things to this home made perfume later.

Now head to the House of Sticks down to the right hand side of Hugo. The shopkeeper is called Freddie and he carves walking sticks. He mentions a Mr Mandrill who tends to break walking sticks frequently. No matter what responses you give Freddie regarding getting the perfect walking stick for you, you always end up with the Veeblefester9000 Rainforest Deluxe. You need to find out who this Mr. Mandrill is.

Go into the Palace of Prostheses where you find Deadeye Dave, who determines who you are by the smell you give off - another use for where the completed home made perfume will come in handy. He shows how his missing monkey is the key to figure out his filing system.


First comes first though. Head outside and use the broken sword to dislodge the manhole cover. Examine the manhole cover to find the following written on it: 'Mindy loves Fred' written next to a scrubbed out 'Jerry loves Mindy'.

Story time! To get a free prosthetic device, you have to humour Dave.

Pirate named... Jerry / Larry / Harry

Fair maiden named... Mindy / Cindy / Wendy

Jerk / Bounder named... Fred / Ned / Jed

Here are the following prizes you get for the different combinations:

Jerry - Mindy - Fred = Ultra stretchy prosthetic skin - This is the combination written on the back of the manhole cover

Jerry - Cindy - Fred = Artificial liver

Jerry - Wendy - Fred = Artifical heart

Jerry - Mindy - Ned = Artificial liver

Jerry - Cindy - Ned = Artificial liver

Jerry - Wendy - Ned = Artificial heart

Jerry - Mindy - Jed = Artificial liver

Jerry - Cindy - Jed = Artificial  heart

Jerry - Wendy - Jed = Artificial heart

Larry - Mindy - Fred = Prosthetic head

Larry - Cindy - Fred = Prosthetic head

Larry - Wendy - Fred = Artificial gut

Larry - Mindy - Ned = Prosthetic head

Larry - Cindy - Ned = Artificial gut

Larry - Wendy - Ned = Artificial gut

Larry - Mindy - Jed = Prosthetic head

Larry - Cindy - Jed = Artificial gut

Larry - Wendy - Jed = Bile-tastic Stom Mech 9000

Harry - Mindy - Fred = Bile-tastic Stom Mech 9000

Harry - Cindy - Fred = Prosthetic feet

Harry - Wendy - Fred = Prosthetic feet

Harry - Mindy - Ned = Bile-tastic Stom Mech 9000

Harry - Cindy - Ned = Prosthetic feet

Harry - Wendy - Ned = Prosthetic bottom (Fauxbutt3000)

Harry - Mindy - Jed = Bile-tastic Stom Mech 9000

Harry - Cindy - Jed = Prosthetic feet

Harry - Wendy - Jed = Prosthetic bottom (Fauxbutt3000)

In total, once you have the following items from Dave, you have everything you need at the moment from the prosthetics shop: Ultra stretchy prosthetic skin, artificial liver, artificial heart, prosthetic head, artificial gut, the Bile-tastick Stom Mech 9000, prosthetic feet, and a prosthetic bottom. In actual fact, just find one combination that will give you each of these as it will save you a lot of time.

To the right of Dave, there is the file retrieval system controls. At the moment, you don't have the combination you need to find the file you will ultimately need so we'll come back to this later.


Now, before you head out of the shop, look at the basket of prosthetic limbs just next to the door. Pick up the wooden prosthetic hand. However, Deadeye Dave hears you trying to take it and orders you to leave it. You need to distract him somehow.

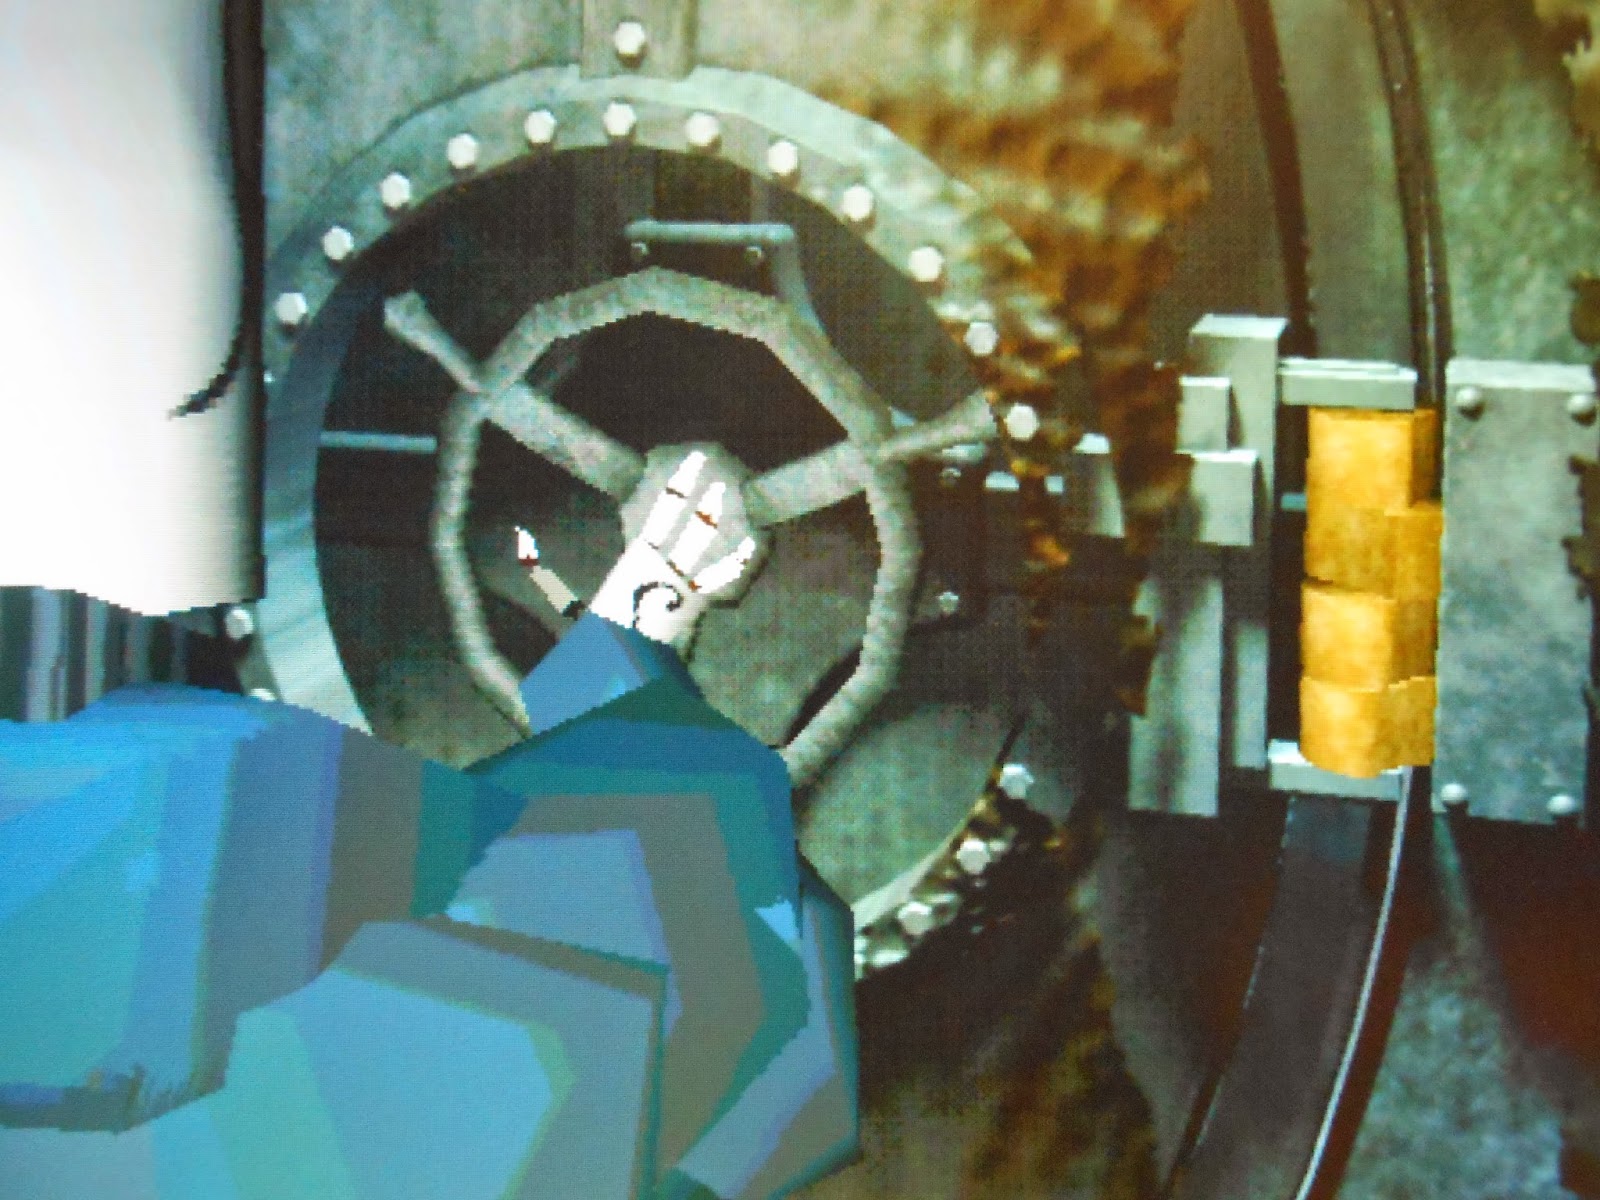
In the meantime, head to Lucre Bank. You find Ozzy Mandrill talking to the bank steward. Ultimately, he gets frustrated and snaps his walking stick in half. Once he has walked off, talk to the bank steward, Brittany. Say that you want to retrieve some items from the safe deposit box. You get allowed into check the safe deposit box. However, upon searching through the safe, you find just junk.
 
You get interrupted by a man disguised as Guybrush who has come to steal the Marley chest, and this leaves you with a tricky situation - you're trapped in the vault. All is not lost though, there are some items in the vault you can use to escape. Pick up the medium and large spounge, the tissue, and sword. Look inside the 'empty' safe of the late Marley. There is a music box (which you can use to distract Deadeye Dave once you get out of the vault) and a bottle of grog behind it. Underneath the handkerchief is a small spounge you need to pick up also.


Break off the bottom hinge with the sword. This will break the sword too though but you can use it to widen the crack where the bottom hinge used to be. Now the gap is larger, put all of the sponges into the gap. Now pour the grog onto the sponges. The door creaks open so much that the top hinge breaks off and you are free from the vault. However, not for long as you are then framed for the robbery by the no nose bandit and put under house arrest. Show Inspector Canard the handkerchief. Even though he tells you the bandits name, Pegnose Pete, he shows how it does not help prove Guybrush's case of innocence.

You need three things to prove Guybrush's innocence:

1) New evidence
2) Stolen bank loot
3) Real criminal brought to justice

In the meantime, head back to the Palace of Prostheses and place the music box down next to the file retrieval system controls and play it so as to distract Deadeye Dave. Go and pick up the wooden hand straight away as the music box stops playing after a few seconds. Now you have the wooden hand, go back to the Bait Shoppe and use it to attract the termits. Once you have the termites on the wooden arm, go to the House of Sticks. There you find a certain Mr. Mandrill picking up his new walking stick. But in doing so, he leaves behind a pile of sawdust. Combine the sawdust with your home made perfume (however, the smell still doesn't remind the perfume seller of anyone). Talk to Freddie about Pegnose Pete. In doing so, you find out he is afraid of ducks and that he is rumoured to have a hideout in marsh otherwise known as the Mystes O' Tyme, situated north of Lucre town.

Head up towards the marshy waters. At this moment in time, don't get on the raft as you don't know whereabouts Pegnose Pete is hiding. Instead, take your perfume spritzer out of your inventory and put some of the marshy water in it so that you now have 'swamp scented perfume'. Now go back to see if it rings any bells with the perfume seller. It still doesn't remind him of anyone.

Now go to Mr Mandrill's house down to the west of the island. In front of the fountain, there is a small flower. Pick up the flower and combine it with your home made perfume. Still no luck with the perfume seller though!

Go to Lucre Bank. Put the prosthetic skin down in place of the manhole cover so that it turns into a trampoline of sorts. Pick up the manhole cover. Now jump into the bank through the upstairs window. Pick up the tupperware box on the desk next to the door. Now turn on the lights by pulling on the pull-chain. This will reveal a silhouette of a nose on the first floor of the bank. Walk over there and pick up the prosthetic nose of Pegnose Pete. Inspector Canard enters the bank and takes the nose as evidence for his 'investigation'.


Head into Ozzie Mandrill's house and challenge him to an insult swordfight. However, no matter how hard you try, he always has a response for your initial insult and for some reason Guybrush has only rubbishy comebacks which he can't build on to throw back at Ozzie Mandrill. However there is a way for him to break his cane again.

Spray the Eau De LeChuck perfume on the platypus rug where he rests his feet. This will get him angry, break the cane and need to get a new one. Upon leaving Ozzie's house, you notice that he does not have his new cane on him. In turn, head back to the House of Sticks and use the termites on his new cane. He will leave a trail of sawdust in his tracks. Before you can further question Ozzie Mandrill about his evil plans, you need to find Pegnose Pete.

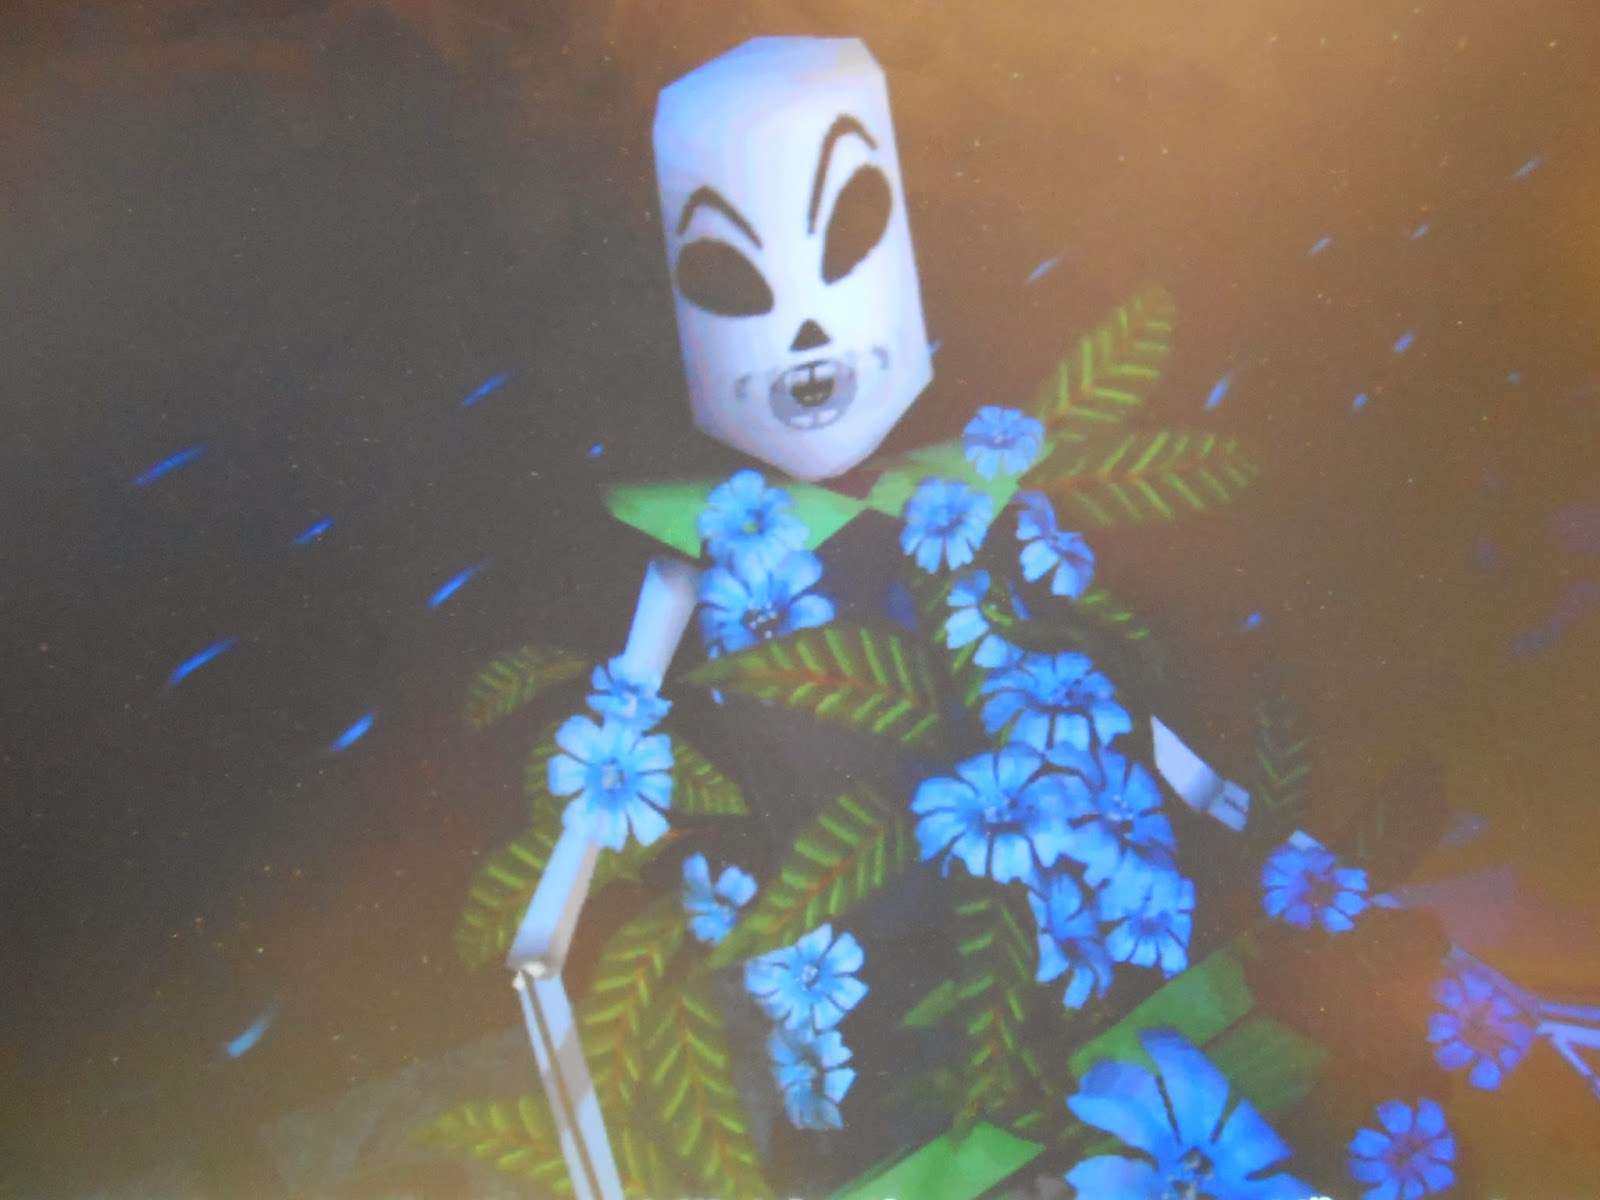
Now to do a few minor things in the meantime... Combine all the prosthetic pieces you picked up off Deadeye Dave and you will be left with an 'abomination of nature' that looks like this:

Once you have done this, go back to the Bait Shoppe and pick up another bit of free bait and pop it in the tupperware container.

-------------------------

From Lucre Bank, follow the path down to the dock where you will find Senor Santos Castaneda and 'Lardbutt the Pirate' playing an intense game of chess. You find out that Senor Santos Castaneda has a crush on Brittany, the bank assistant who has recently been fired. Go up to tell Brittany that he has a crush on him. No surprises there, Brittany just thinks he spends too much time playing chess. You need to distract 'Lardbutt' as he is the one who is the least paying attention to the game. Just keep saying there are things on his shoulder or there's a three headed monkey behind him about three or four times and he will accidentally move a piece on the board. Do the same with Santos. Now they are arguing amongst themselves, pick up the clock. Now you have the clock, go up to the marsh and place it on the raft. This will be your navigation for going through the marsh to find Pegnose Pete's hideout. However, you still need the map.

 
Remember that perfume that you've made using the bait, marshy water, sawdust and flower? Well go back to the Palace of Prostheses and spray it on Deadeye Dave. He lets known that the smell is that of a certain Ulysses F. Toughguy, or Pegnose Pete, who lives in the marshy lands. The map to get to his hideout is in the file system but the only way to get it is to turn the dials to the right configuration so as to retrieve it from their system.

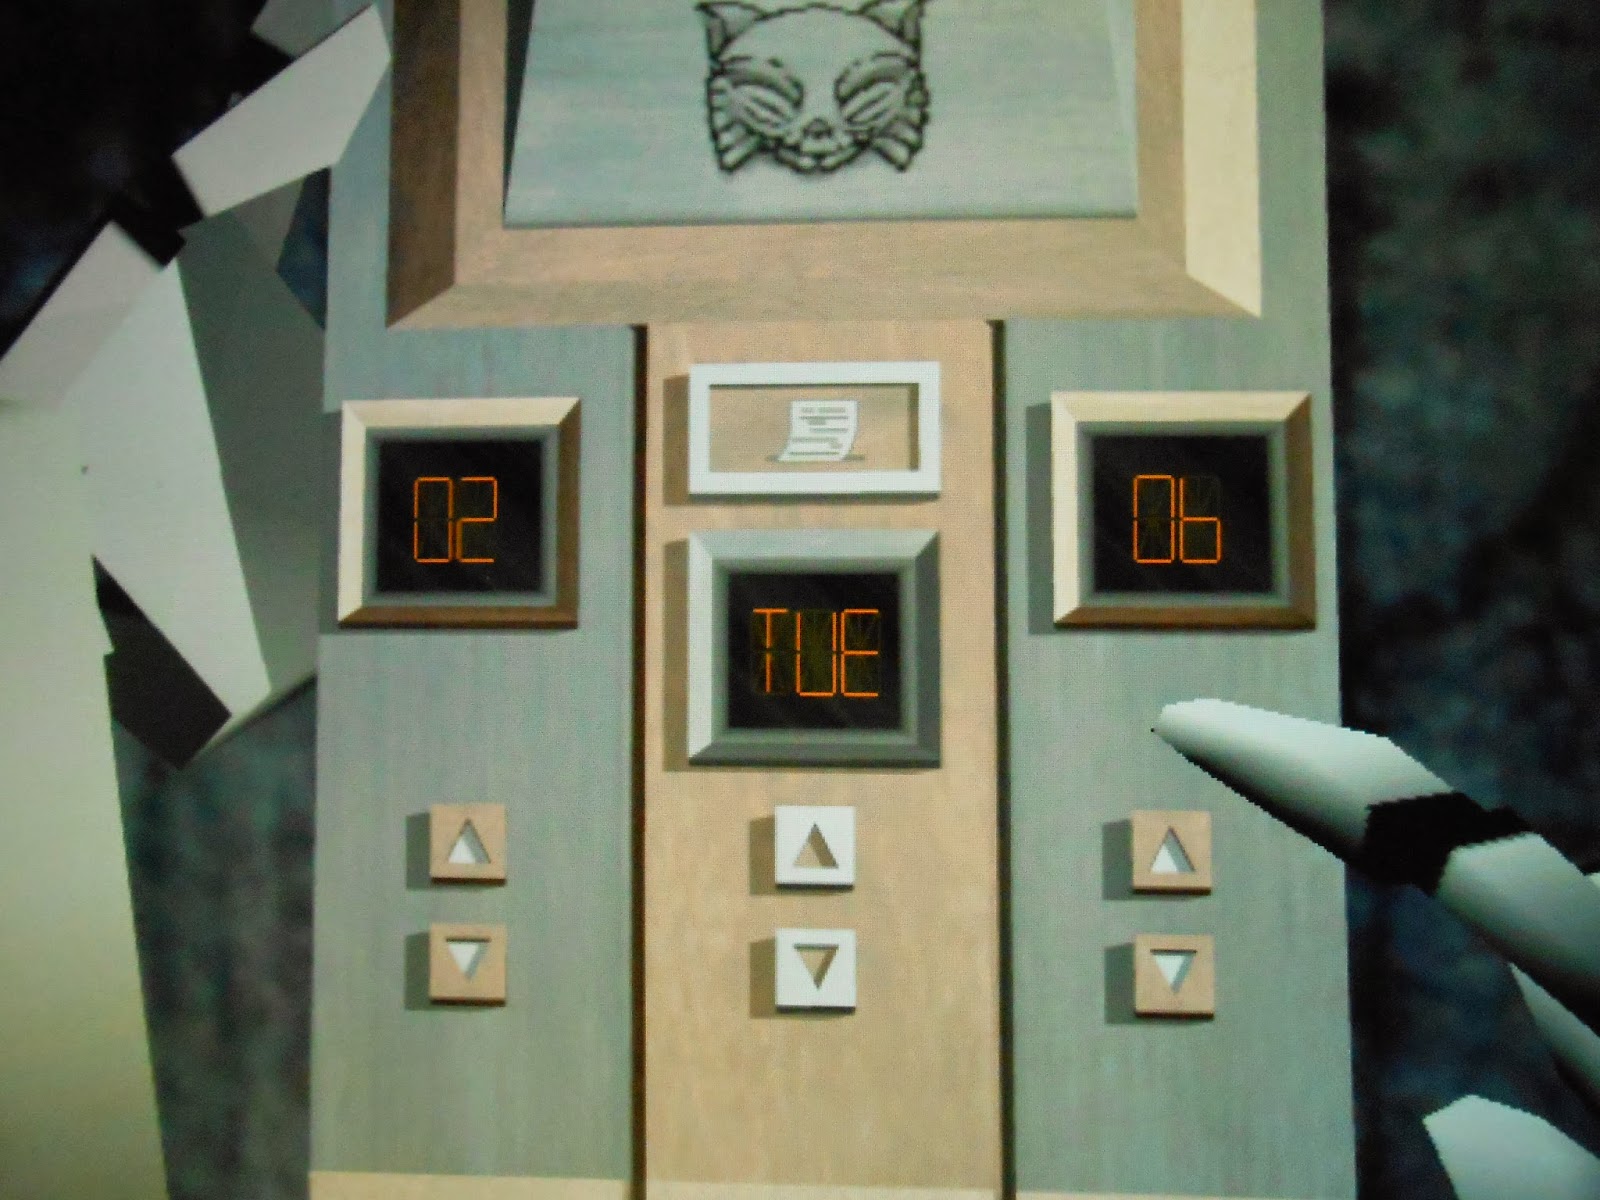
To work out the system, I figured out a way to find out what image relates to what letters of the alphabet. As there are 5 different images on the controls, you'd imagine the alphabet to be divided into 5 sections as a result. The code is below:

Three bunnies = Adeline A Apricot
Three trees = Eric G. FongDaiGawSmack
Three pumpkins = Jefferey J Jumper
Three monkeys = Nathanial O. Surge
Three bananas = Xylophone Y. Zimmerman

Therefore, if we go from these, Bunnies resemble letters A - D, Trees resemble E - I, Pumpkins resemble J - M, Monkeys resemble N - S, and Bananas resemble T - Z

In turn, if we were to take this as gospel, so to speak, then we can use this system to find out Pegnose Pete's (or Ulysses F. Toughguy in this case) map to his hideout. If we use this system then, the code we need to enter into the system is Banana - Tree - Banana


Now we have finally got the directions to Pegnose Pete's house. They are as follows


Once you are on the raft, you need to go in the direction shown relating to whichever time is shown on the clock in the bottom right hand corner. So in my game, as I'm not sure it differs from game to game or from one attempt to another, I went as follows:

East (1:40) - North (12:50) - West (1:55) - South (2:45) (At this point you see a future Guybrush who gives you a key, a rubber chicken, a pistol, and, once you open the gate, a rope) - East (12:15) - East (3:25) (At this point, you are the future Guybrush and you see another Guybrush - now give him the same items previous Guybrush gave you - Respond with 'You'll see soon enough. Could you be a sport and help yourself through the gate now?' and say the number 'Twelve'  - the key, rubber chicken, pistol and rope) - South (3:55) - South (12:35)

 
If you followed these instructions to the dot, then you will reach Pegnose Pete's hideout. Quaint. If you go towards the house, you can hear voices. It is Pegnose Pete talking to Ozzie Mandrill about getting money for looting Lucre Bank. Once they have finished talking and Ozzie has gone back to his creepy mansion, take the chicken grease out of your inventory and put it on the welcome mat outside Pegnose's front door. Now go round the side of his house and put the duck through the window to scare him. He runs out the door, slips on the mat and falls into his own wooden trap.


Now you are back with Inspector Canard who says that you still need to prove Pegnose Pete committed the crime of robbing Lucre Bank, and, to do that you need to find his hidden cave! But first, head to Ozzie Mandrill's house and say that you know about him and Pegnose Pete working together to frame Guybrush. However, he too doesn't believe you know about their plot until you find the loot too. Nonetheless, keep pestering him and when he asks what Pegnose Pete's Booty Showcase loot looked like, answer by saying 'It's very nice. Lots of booty'. Ozzie Mandrill heads off to the hidden cave and leaves a trail of sawdust behind as a result of the termites eating their way through the walking stick. Head outside the house and you will find a route marked by the sawdust markings that lead right to Pegnose Pete's hidden cave.


You are shown to a small alcove in a beach with a few mountains in the backdrop. Ozzie faces the camera and exclaims how this Ultimate Insult business has left him 'uncharacteristically baffled'. Follow the path around until you find a hidden passage underneath the beach. Climb down it and you will be welcomed by a bar-esque setting. There is a red button on the front of the table. Press it. You uncover the safe where the loot and Marley family heirlooms are being kept - behind reinforced glass!

Take out the manhole cover and throw it at the glass. It hits the glass but no matter how many times it doesn't break it! Head back outside the cave and dive into the deep water to the right. Make sure that you have some bait in the tupperware container so as to attract the luminous fish so as to make some form of light so that Guybrush can navigate his way around undersea.

Once you have the lumious fish trapped in the tupperware container, walk towards the 'secret door' which will lead you into where the Marley heirlooms and other loot Pegnose Pete stole. Pick up the loot upon doing so, a tiny screw falls out - a screw that can place Pegnose Pete at the scene of the crime and in committing the crime itself. Now you have all the resources you need to clear Guybrush's name from Inspector Canard's 'Wanted List'.

Head back to the prison and show Inspector Canard what you found in the cave.

The screw fits!

Pegnose Pete gets accused of committing the robbery, then escapes custody, Guybrush gets freed of his anklet and then the Dainty Lady sets sail back to Melee Island.

Cutscene to Charles L. Charles having a 23% lead in the poll and then interrupting Guybrush's extensive re-cap on his experiences on Lucre Island to break the news that he is really LeChuck!


--------------------

Part II - Enter the Manatee

Guybrush gets tasked by Elaine to stop Ozzie Mandrill and LeChuck getting their hands on the Ultimate Insult.

What is an Ultimate Insult?
Go to the voodoo lady and ask her about the Ultimate Insult. She exclaims how it is the fiercest of insult spoken in an ancient, forgotten tongue that results in pirates or those who encounter such an insult turning into ego-less mass of goo...  She carries on to say how it is spoken in a language so ancient - a primal language - that it has the power to speak to heart of a person's soul and mock it into oblivion.

Where is an Ultimate Insult?
Pieces of Ultimate Insult need to be put together. These pieces you can find on one island - not Monkey Island apparently - it is lost to the 'vagueries of time'

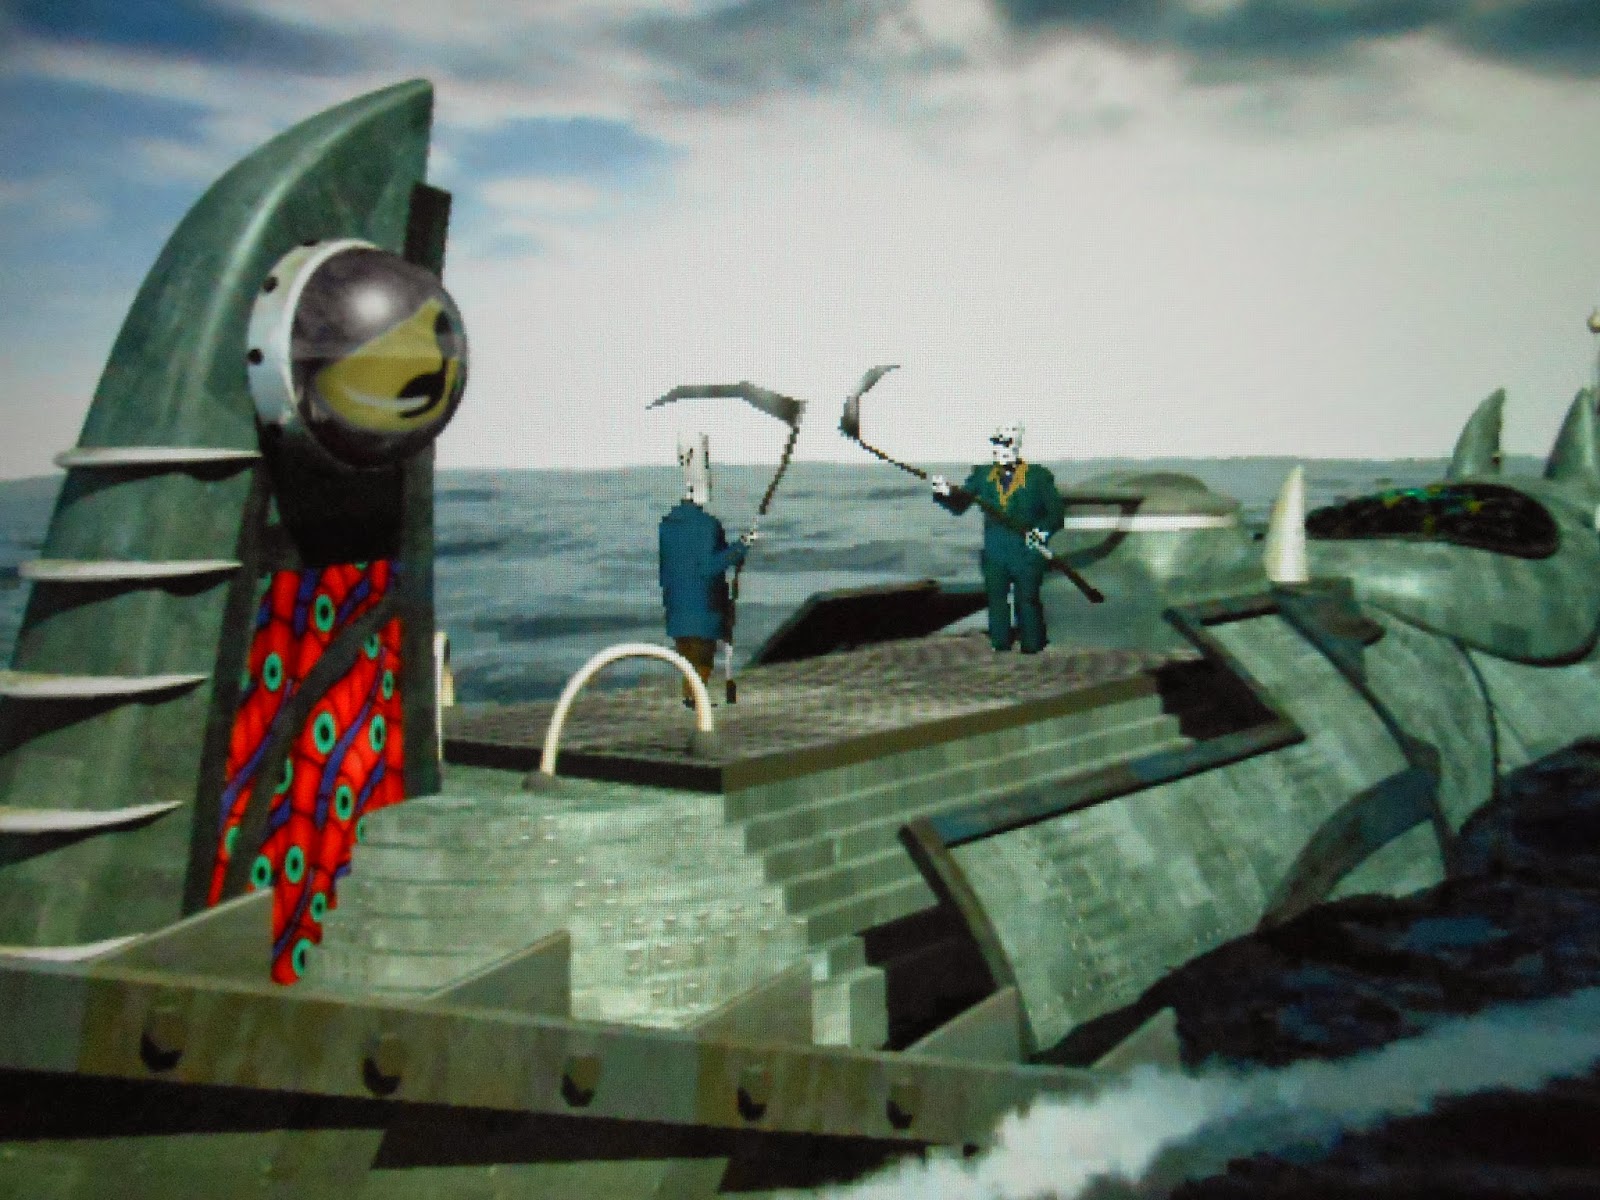
Show the Voodoo Lady the Marley heirlooms. This will reveal a pair of earrings, a necklace, a pen on a chain, and a fourth wedding gift that cannot be conjured from the chest. You will need to find this 'something blue' on Melee Island. The Voodoo Lady claims that you need to find the woman who wore the earrings in order to find what they mean. Remember how the figurehead on the front of the Dainty Lady had ear-piercings? Put the earrings and necklace on the figurehead of the ship down at the dockyard. This will lead to the figurehead being able to talk. At the moment, she's not in a very talkative mood so come back later once you've found the fourth wedding present.

If you head past the grog machine, you see there is a quearter in the change return slot. Pick it up and buy a grog. The quarter gets jammed, so kick, shake, punch and yell at the grog machine until it releases a load of cans.

Go up to Meathook's House of Wax - it is now open for business! Talk to Meathook. You can have a comedy opening exchange with him by saying 'They can't kill me - I've got a five game contract' to which Meathook moans 'All I get is extended cameos'.

Meathook mentions how Grandpa Marley commissioned him to paint a map of the Tri-Island area of which he then had to cover up by painting a landscape over the top of it. Once you find this out, head back to where the Scumm Bar used to be! It is now turned into LuaBar - a sushi bar!

Head to the left and pick up the pair of chopsticks on the table. Now head up to the top part of the restaurant and talk to the patron. He tells you that the 'Flaming Skuttlefish' is the thing to get off the menu. Keep this in mind! Take a seat on the lower part of the restaurant and order the flaming skuttlefish off of the waitress. You need to somehow make the mechanism stop so that the flaming skuttlefish stops right underneath the wax painting. If you use the chopsticks, they just snap in half and you can't use the pen on chain as it's not sturdy enough.

Go back up to Meathook. The bucket with a paintbrush in got moved to the left hand side of Meathook. Pick the paintbrush up. Now head back to the LuaBar. Re-order the flaming skuttlefish and now use the paintbrush to stop the mechanism. Now 'jam paint brush into sushi boat propulsion mechanism' just after the ship goes past the pillar. This can get frustrating as if you're a millisecond out then it doesn't work. Even when the flaming ship is underneath the painting, the chef comes out and pulls out the paintbrush. You need to get rid of the chef somehow.


To do so, stick the paint brush in the mechanism, and when he comes out to fix the system, go into the kitchen and pour grog into the generator next to the stove. This will cause the monkeys working the generator to slow down and ultimately stop. To make this ultimately work, you need the flaming skuttlefish ship to be underneath the painting before you go into the kitchen and pour the grog into the generator.

You now have the map of the entire Tri-Island Area from Meathook's 'blue period' - the fourth piece of the puzzle you needed. Pick up the paintbrush on your way out. Head back to Meathook's House of Wax where he tells you that the canvas he painted the map on was a 'special voodoo canvas'.


Now head down to the docks and hand the blue painting to the figure head of the Dainty Lady. Now give the pen on a chain to the figure head and it will guide you to where you need to go to find the parts of the Ultimate Insult!

It shows up as a cross across to Jambalaya Island - the home of the Ultimate Insult, along with a drawing on the back as to the items needed to create the Ultimate Insult.

Cue cutscene to Elaine asking for the gubanatorial symbol back so as to help her re-election campaign, and for the Dainty Lady to sail across the Tri-Island Area and land on Jumbalaya Island.

END OF DISC ONE

Now we have reached the end of disc one of 'Escape From Monkey Island', we will continue onto Part 2 of my walkthrough on the next blog. Hope you are enjoying the walkthrough so far and see you on the other side my Guybrush Threepwood loving gamers

Jonathan Whitehead

Sunday 19 October 2014

Grim Fandango - Part 2

Welcome to Part 2 of my Grim Fandango walkthrough. In this section, we will pick up from where we left off at the end of Part 1 - in search of the 3 things Manny needs to get before he can board a ship out of Rubacava: a Maritime Union Card, Sea Bee tools and to find Naranja. You have already found where Naranja is - getting a tattoo on board the submarine down at the dockyard. Now to find the remaining two items.
 
If you head to the Blue Casket, a small bar / entertainment venue in the heart of Rubacava and you will find some answers you are looking for. You can go up to the microphone and read out a poem and ask if anyone knows where to get the tools or a union card from but this gets you nowhere initially. You can talk to the Sea Bees sitting in the bottom right of the front room of the Blue Casket too, but you will need a good poem talking about labor revolts in order to get their attention one feels!

Head towards to the bottom of the screen until you reach the back room of the venue where you find Lola, a press journalist who is looking to frame the manager for having an affair with her husband's lawyer, Olivia Ofrenda. Convince her to do a poem on open mic night. Initially, she copies the poem you said, but says her own poems in the follow ups if you ask her to say another one. No matter how much you try to make a well versed poem, you will always get hissed at by the Sea Bees in the corner. Head out of the Blue Casket and head towards the S.S Limbo.


Examine the moon and you and the sea captain will recite a poem:

'It shone pale as bone
As I stood there alone
And I thought to myself how the moon,
That night cast its light
On my hearts true delight
And the reef where her body was strewn.'

If only you could recite this poem in the Blue Casket at the Open Mic night...

Take out the letter from Salvador and read it in full. He says that the man who corrupted the DOD was an individual who went by the name Hector LeMans. Manny gets promoted to Special Agent status within the Lost Souls Alliance. Salvador also warns Manny of people back in El Marrow have become aware of Manny's presence in Rubacava.

Once you have finished reading this letter, head back to Calavera Cafe where Lupe has a note for Manny from Lola. Lupe found the message but supposedly someone has tampered with it and the key that was inside the message has gone missing! Talk to Glottis also to let him know that you both are leaving town tonight.


Head into Manny's casino now and talk to Chowchilla Charlie regarding the Union Cards. He says that he can cut you a deal - if Manny can retrieve Charlie's money from Maximino, then he can make Manny a Union card worthy of making him President of the Union. To help you out, Charlie gives you a VIP pass to the High Roller's Lounge where there should be a safe with Chowchilla Charlie's suitcase in. So now, head back to the race track. Raoul will let you up into the VIP Lounge. Head into the kitchen (in the middle of the room once you get out of the elevator) and pick up the turkey baster that is lying on the side at the bottom left of your screen.


Now head over to the man in the blue-y green suit on the bottom right of your screen in the main lounge area and you find it is Nick Virago, the man who Lola tried to frame for having an affair with Olivia, down in the Blue Cashet. Talk to him regarding needing a lawyer at your casino because people think Manny's tables are fixed. Tell him that he will tell Max about him and Olivia, and this will annoy Nick so much he gets up and leaves. Once he leaves, pick up his cigarette case. Something rattles inside - this same something Nick had dropped on the floor moments before whilst talking to Manny. My best bet is that it is the key Lupe was meant to give you!


If you go back into the kitchen and follow the path around, you will find a lizard-esque green monster with a mohawk even Freddie Ljungberg would be proud of. He is protecting the lift door to the elevator that would take you down to the wine cellar. You need to get him out the way if possible. Once you have searched everywhere else in the High Roller's Lounge, it is clear that there is no safe anywhere to be seen. Hence, Charlie's money and suitcase must be down in that wine cellar, or at least somewhere that lift goes past...


You can open the sealed lid on top of the keg of wine with the can opener once the keg is empty - only then will the man guarding the elevator take it down to the wine cellar.

Head back to the Blue Casket. Remember the letter you read out from Salvador about how important Manny was in the progress made to work that the LSA was currently undertaking? Read it out to the Sea Bees in their booth so as to show them that you are fighting against corruption as well. He shows them all the letter and they welcome him as a brother of the revolution. Now pick up the book on the table - 'Labor Organisation and Revolt... made easy'. Now show this book to the Sea Bees down at the dock.
 
-----------------

Cue a cutscene with the Sea Bees starting to build up a head of steam and start a mini revolt. The ringleader, Terry, is taken away by the police and it looks like Manny needs to go and find a lawyer... Good thing Nick owes you a favour.


-----------------

If you go back to the VIP High Roller's Lounge, Nick is still not there so you need wait until you complete other parts of the game before he comes back!

Head up to Carla's office now. Give her the cigarette box you took off of Nick earlier. Tell her that you found it underneath her desk and that some crafty looking individual put it there. She will put it in the safe next to her desk (a bomb safety mechanism) and this will blow it up. Carla takes the remnants out of the safe and lone behold Manny has the key he was looking for! He says he will have to give it to Police Officer Bogen. Now go back to the building where the coroner, Membrillo, is. You find it is where they are keeping Terry, the head of the Sea Bees you gave the revolution inspiring book to earlier. However, this is not what the key, which you just obtained, opens. Find what this opens first.

Head down to the lighthouse now (follow the pathway down next to where Terry and the other Sea Bees gathered) and see if the key works on that door. You find that this key does open the door. Enter the lighthouse. You find out that Nick made Lola into a flowerbed as punishment for taking the picture of him and Olivia. Once Lola has blown away into the night sky, all that is left behind is a card with a picture of a tongue with the words 'Lengua #22' on it.

 
Go to the Blue Casket now. Head into the back room where the sink and dishwasher is. Get the turkey baster out and use it with the sink full of dirty hookah water. Now head down to the submarine where Naranja is getting his tattoo. If you try and fill up the bottle of booze Naranja is drinking with the dirty hookah water, Manny says that it is too inconspicuous and that he will notice. So, go to the fridge, open the door, and open one of the containers in the fridge so that the door is jammed open for a little bit of time. Now go over to the bottle and fill it up with the hookah water whilst both Toto and Naranja are distracted by the open door. Naranja drinks the spiked drink and passes out good and proper. Pick up his ensign and leave.


Now go to the coroner and put the ensign of Naranja on one of the bodies lying on the tables. Initially, Membrillo does not notice anything different with the corpses but leave it for a while and go back later.
 
Whilst you're waiting, go back to the cafe and hand the card with the tongue to Lupe so that Manny picks up Lola's coat. Upon searching the coat, you can find a card with the words 'No. 36 - The Rusty Anchor' on it. Firstly, hand the VIP High Roller's Lounge card to Glottis, who reacts badly to being reminded about it and runs off to the VIP Lounge.

Head over to the lounge, and you see Glottis getting very drunk whilst watching the cat races. Go up to the balcony and talk to Glottis. There is no way to talk to Glottis to make him see sense. Raol keeps on going into the pantry. You need to close the door behind him and find something to lock the door behind him as you cannot empty the keg of wine by the time he gets out again. In turn, the only thing in your inventory that you can use to lock the door is your scythe. Once Raoul is in the pantry, close the door behind him, take your scythe out and use it on the door. This leads the waiter to get claustrophobic and bang the door - leading to a tin of cat food to fall off the wall and knocking him out. This annoys Glottis. In turn, he comes down to the kitchen and drinks the entire keg of wine!


Climb up the ladder and use the can opener on the top of the keg. You will lose the can opener through doing this but you can fit into the keg as a result of this. Climb into the keg. Glottis comes into the kitchen, takes the scythe out of the pantry door and lets the waiter out. You will be put down in the cellar. Get into the pick up truck and drive into the elevator. Push the red button on the side of the elevator. Make sure that the forklift is as far on the right hand side of the elevator as you can be. Once the lift starts moving, drive the forklift towards the lift doors, keeping hold of the forward directional button all the time until the forklift gets caught on the top of the doors to the secret floor.


Exit the forklift and go round to the other side of it where there is a lever you need to pull so that the forks lift up, ultimately pulling the lift down so that you can exit through the doors.

You are now on the secret level within the VIP High Roller's Club. Go down the corridor until you come into a small room where you will find Chowchilla Charlie's suitcase. Pick it up.


Cutscene to Manny coming out of the VIP lift. He is welcomed by Charlie who is holding a gun. He gives you the union card you were needing in return for the suitcase. You now have two of the three parts needed to get on the S.S. Limbo. The only other thing you need is tools for Glottis.


In the meantime, head back up to Carla's office. You need her to find any kind of metal on you. Drink the 'Marillo de Oro' liqueur you picked up from Manny's cafe behind the bar. Drink enough that if you try to drink any more, Manny says that he couldn't stomach any more metal. Then either swipe the scythe in front of the metal detector or just walk into it so as to set it off. You need to set off the metal detector before Manny burps, otherwise he won't set off Carla's metal detector. Keep asking Carla about the metal detector she has until she throws it out into the cat dump.


 Head down to the dumping area out back of the cat races. Use the scythe to find out where the metal detector fell. It doesn't pick up the metal detector initially, but the image below shows the place you need to stand to find it!

Now you need to find out what that note 'No. 36 - The Rusty Anchor' means. Head down to where Naranja is passed out and give the note to Toto. He says how it is one of his favourite and most famous tattoo designs. He gives you a picture showing cat races with a balloon carrying the message 'Marry Me Olivia??', the number #114 on the bottom left, and the number 6 on both sides of the podium.
 

Remember how Chowchilla Charlie 'gave' you the ticket printer? You can print off your own betting stabs for the cat races. To do this, press 'U' once you have selected the ticket printer, press U again until you get the screen shown below...

Press the sideways directional buttons across until you get to the print button in the middle. To print the ticket off, press the upward directional button. Hand to the ticket attendant. You don't get any positive response from the 'reward' you get given. The loudspeaker says that Tuesday is Kitty Hat day. Look at the photo and you can see all of the crowd are wearing Kitty Hats. Hence, the day on the ticket stub should be put to Tuesday. Now go down to where the giant stuffed cat is and read the plaque underneath it:-

'Beloved Sanspoof,
This regal and magestic feline was a record-holder for speed, and a favourite of the crowds here in Rubacava for many years... until her career was suddenly and tragically cut short on the second week of the racing season... when the airship Olivia 1, on its maiden voyage, crashed onto the track mid-race, and exploded. Many bereaved fans testified later that, before the blimp hit, Sanspoof... was in the lead'

Now head back upstairs and look at the photo again. You see the number 6 on the back, this represents what race number it is. Soooo, in the ticket printer, type in what week it was on the left hand side, the day in the middle, and the race number on the right hand side. It should look like the following:
Hand it to the ticket officer, and you finally have the photo you have been searching for from Lola - that of Max and Olivia kissing at the Blue Casket. Now head back to the VIP High Roller's Lounge. Max is now finally back in his seat smoking on a cigarette. Take the newly acquired photo out of your inventory and hand it to him. Max agrees to free Terry.


Now head to Membrillo in the morgue. He still hasn't found the ensign you put on one of the bodies. So, to speed up this process, hand him the metal detector. He finally finds the ensign you planted on the body and Membrillo phones up the captain of the S.S. Limbo to break the news that Naranja has been sprouted. You now lose the metal detector from your inventory.


The only thing Manny needs to find now are tools for Glottis. To find these, head back to where Terry and his Sea Bees are gathered chanting against Police Officer Bogen. To the right are tools they have just left around. They are too heavy for Manny to pick up himself, so he will get Glottis to pick them up before they get on the S.S. Limbo. However, when you go back to the VIP Lounge, Glottis is still drunk and Manny cannot make him see sense.

You now have to go back to Manny's casino. You will find Police Officer Bogen there for a second spell at hoping for a lucky streak. In turn, head upstairs and tamper with the roulette results on Manny's remote control on his desk. As a result, Manny's casino gets shut down and Glottis gets thrown out of the VIP Lounge! You now both board the S.S Limbo en route to Puerto Zapato.


----------------------

Cutscene to 1 year later when Manny has become the captain of the S.S. Limbo and Glottis has completely renovated the ship inside and out.

----------------------


Once the cutscene comes to a close, you get a message from one of the carrier pigeons sent by Salvador Limones, warning Manny of possible danger upon leaving the ship. Once the carrier pigeon has flown away, walk in to the inside of the ship through the door to the left of the screen. You find out that all the crew members have all been sprouted. Upon walking down the ladder, there are officials at the other end of the ship who try to seize you. However, Glottis drags you into the engine room.

On each side of the engine room, you can look through the portholes to see there is one anchor on each side. You will need to release both of these anchors in such a way that they hook together under the water. To release or pull up the anchors, you need to press the red buttons on the walls of the engine room. Once you have got them hooked together, push the red button to pull up both the anchors onto the left hand side of the boat. Once you have done this, take out your scythe and use it on the joined together anchors. This will hook one of the anchors over the porthole.


Once you have the anchor hooked onto the porthole, press the red button beneath it to raise the anchor. This creates a large rip in the hull of the ship. Now start up the engines and push the downward directional button to separate the ship into two parts.
 

----------------

Cutscene where the customs officials start sinking on the remains of the ship left behind in port. Manny and Glottis are able to keep the other half of the ship, now named S.S. Lola, above water for a short amount of time before they too are sinking to the bottom of the ocean. You are now in the Sea of Lament and need to find the Big Pearl.


----------------

Initially, you cannot leave the area shaded in light, but you see a character, Chepito, walking around the wreckage of the S.S. Lola with a lantern on his head. You ask him a few questions and you see that it is because of this light that he is not swallowed up by the lost sea beast souls of the ocean. In turn, you need to get that lantern off of him or bring him with you. Both of which you cannot do by yourself.

So, head over to where Glottis is and when Chepito walks past you press 'A' to try and pull the light off his head. Use the backward directional button to drag him into Glottis, who then picks him up. The three of you now walk towards the Big Pearl. The pearl itself is guarded by a large purple octopus. Walk along the ridge to your right towards the big rock in the distance. Once you reach there, you see the rock has clams on it which attach themselves to anything that walk past it. Walk around the rock. This makes Chepito follow you but he gets caught up in the clams and taken in by the octopus. Whilst this is happening, Manny and Glottis get into the submarine under the radar.


The octopus drives the submarine to the Edge of the World. Head up to the elevator. The door on the left is locked at the moment. Carry on down the other corridor until you reach a room that looks like somebody's lounge. Head through the door. Here, you find Meche Colomar and Domino. Glottis belatedly enters the fold but Domino releases a trap door and Glottis falls through it. Domino then knocks Manny out.


You then wake up in the room that was just previously locked. There are two winged children, otherwise known as Pugsy and Bibi, in a cage who are now your 'employees'. Speak to the children until the boy throws his mini chisel out of the cage. You also see that they are chiseling the coral that you previously used as the hook to get to the roof of the DOD. If you head down the corridor back to the lounge, you see Meche. Talking to her makes it apparant that Domino has brainwashed her into thinking that Manny decieved her and forgot about her. Meche knows that Manny now works for the LSA and wants to see a gun as proof. As Manny doesn't have a gun, he will need to find one. At the moment, the only person we have seen who has a gun is Domino.


Head down the elevator and if you go to the right of your screen, you will find a conveyer belt esque transportation tube. There is a lever you can push to alter the direction of the flow. You do not need to use this yet.

Go back towards the lift and carry on towards the left of the screen. There, you find Chepito. He says that to get a gun, you need to find something he deems worthy to trade it for. All you have at the moment is your scythe and the mini chisel the boy threw out of his cage. Give him the small chisel. In turn, he gives you his 'Bust-All' numatic drill.

If you continue going down towards the left of the screen, you reach another convery belt esque transportation tube. Walk as far down the left hand side of it as possible until you start floating in the water. Swim towards the bottom of the screen where you will be able to clamber down a long metal chain. At the bottom of this chain, you reach the engine of another ship, an engine that Glottis is currently working on - he survived the fall!


Now, as much as I've tried, I can't get back down to Glottis after seeing him. So head back to where Meche is. You need to look around at the clues and what you have available to you. You notice the bin is empty but there is an ash tray next to Meche who is smoking. Sooo, you need to move the ash tray around a little bit just by pressing 'U' on it. This will make Meche stub her stockings with the cigarette butt and throw them in the bin. Manny is getting very hot under the collar whilst seductive, romantic music is played during this scene. Take these stockings down to Chepito and he will exchange these for a gun.


Now head back to Meche and give her the gun. Meche points the sproutilla gun at Manny and tells him to move into Domino's office. Things go sour and Domino locks Meche in the cooler.


Head out into the hallway and she is locked behind the large safe. Use the 'Bust-All' numatic drill on the lock to the right of the door (next to the wheel). You will blast a hole of minor proportions in the side of the door. Through this gap, you can see the tumblers of the combination lock. You need to turn the wheel in the middle of the door until all of these line up. It always seems to be the second from top tumbler that is the problem so just turn the wheel both ways until all of them line up.


This is trickier than it sounds. There are 5 parts to this!

*NB* - In doing this, it is important to do individual clicks of the wheel in one way or the other to save any problems of over-turning the tumblers!

1) Turn the wheel until all four tumblers are turning and keep turning the same direction until the top tumbler is even with the doorframe (like below)


2) Turn the wheel in the opposite direction now until the 2nd tumbler down moves into line with the top tumbler.

3) Turn the wheel in the same direction you turned it first time round until the 2nd tumbler from bottom lines up with the top 2. *NB* It is important to note that with this one, don't worry if it doesn't line up perfectly, once you line up the bottom tumbler it will go into place!!

4) Turn the wheel in the opposite direction to line up the bottom tumbler.


5) This is the important part. If you were to open the door just as it was, it would just reset. So put your scythe in the gap next to the tumblers and then open the door.


The door is now open! Huzzah. At last!

Walk through the door. Close the door behind you and then use the scythe on the circuit board on the top left of the safe door. This opens a secret passageway. Enter 'Meche's Room' and you see a large pipe to the right of the screen. If you try to open the valve by hand, nothing happens, Manny needs to take drastic action.

Take out your scythe and use it on the fire coolant system pipes above. The water comes out slowly and doesn't set on the ground either so you can't float away like Manny hoped to. You can turn off the water by turning the valve on the large pipe to the right. Now, Manny is not the strongest of individuals so picking up the axe is somewhat of a mission for his little boney figure. Also, you can't pick up or use the armour itself.

So, after much trial and error, you need to have the water on for this! Then hit the blue tile using the big axe in the middle. As Manny can't pick up the axe fully, make sure the axe head is resting on that blue tile before Manny tries to pick it up. Once he drops the axe on the blue tile, a hole will emerge to the right of it just big enough to fit through.


You get transported to the sandy beach on the other side of the island.

Head to the large crane. To get here from the beach you just go up the slope and up the staircase on the left of the screen. Move the crane to around the right hand side where the beach is and drop the chain and exit the crane. Go to where the crane head is connected to the chain and use the 'Bust-All' numatic drill to break the crane and separate it from the chain. Pop into the crane and drop the chain on the rotating grinders to break them.


Now move the crane round to the left hand side of the island and drop the chain so that it is just in front of the conveyer belt esque transportation tube. Now exit the crane and go down to the chain. Go underwater and push the lever so it changes the direction of the flow of water, ultimately leading to the chain being dragged along the entire tubing system.
 
If you go down to where Glottis is, you cannot see the chain you just moved anyways so there is no need to go there. Instead, keep moving the lever up and down until the chain is around the arrow sign - which if you look carefully, is the anchor to the ship down below!


Now head back to the crane and once you start to move away from your position, it goes to a cutscene of the ship being taken out of the water with Glottis holding onto the chain, like Miley Cyrus in Wrecking Ball... Now that's not a nice image!

Domino sees the smoke from the smoke and can't believe his eyes! He comes after Manny in his submarine - purple octopus in toe - and disrupts Manny and Meche's magical romantic moment. Manny jumps onto the submarine to confront Domino. Instead of trying to attack Domino, use your scythe to attack the eye of the octopus.


The octopus swims away leaving no-one to drive the submarine. Domino starts giving Manny this big old lecture about how Manny should be more like him. All the while, Manny's new ship, with the rotating grinders on the front of it, comes steamrolling towards the submarine and swallows up Domino, leaving Manny to be rescued last minute by Pugsy and Bibi, your children with wings.


-------------------

Year 4


Cutscene to Glottis and the ships crew walking across a desolate landscape and in the end registering with some form of registrar for what we don't know as of yet. Glottis falls off the cliff in sheer exhaustion it looks like. Manny, in a new grey suit and red hat ends up in a very grey place with seemingly very little to explore.

-------------------

You restart the game in the destination of the Number Nine train. Yet, even though your companions had tickets, they were apparently fraudulant ones. So, you need to get them tickets so as to allow them to be finally free from Hector LeMans. Upon talking to the gate keeper, you find out that your companions are in 'Waiting Area 2' - a room that is currently locked. So, go into the hallway that is through the doorway underneath the gate keeper. Here you will find Chepito in a small pool doing circuits. You convince him that there is a better way to live than to walk around in circles and he walks off.

Before you can go down the steps to the left of the screen, the gate keeper gives you a note sent from Hector LeMans. It reads: 'I know what you're up to. I've been watching. Stay there, I'm coming to sprout you myself. Yours truly, Hector LeMans.'

Head down the steps until you reach an opening where there are two van loads of coffins and a loose coffin strayed out on the ground. Open up the coffin and you will find Bruno Martinez in it. Remember him? The midget you found at the poisoning at the start of the game? He gives you back the mug you gave him. As Manny filled the coffin with packing foam, the mug too is filled to the brim with packing foam. This could come in handy later.


Go back up the steps as you can't walk down the path to the left, and then walk to your right until you stumble into a room where Glottis is being attended to by what seems like several mini Glottis's and a woman. Glottis is in agony. He wants to save everyone. He draws a new design for his final 'Bone-Wagon' esque vehicle that could save him - upon further investigation, Manny sees it is a rocket sled. But you would need the right tools.


Go into the kitchen below where Glottis is lying down. Open the drawer on the far right of the screen and put the mug with the packing foam on the mug rack. Pick up a rag from the drawer. You can use the rag with the toaster to make a warm rag. Now use the rag with the recycled oil in the containers. Now put the rag back in the toaster. This sets fire to the rag. One of the gremlins runs down to try put the fire out and in the process, the foam in the mug you put on the rack reacts with the fire and shoots off like a rocket. The gremlins have a great idea to make a packing foam fuelled rocket sled.


-----------------

Cutscene to the final product, a rocket sled that even Glottis would be proud of. Speaking of Glottis, he is strewn across the top of the sled.


 Upon passing through Rubacava, Glottis wakes up. Both Manny and Meche are in the lower compartment. Cue Glottis being scared and ultimately de-railing the sled into the water. You all end up on the shore of Rubacava. Glottis says how their car may still be in the shed but upon further investigation, they find it is booby trapped.

-----------------

Manny doesn't want to set foot in the garage in case he knocks any of the dominoes. In turn, head out of the garage. Head back to where the sea captain is and you will be embroiled in an automatic conversation about the S.S. Limbo and the S.S. Lamancha. Upon hearing the S.S. Lamancha is in Puerto Zapato, the sea captain leaves. Pick up his ship in a bottle creation.

Head to the Blue Casket now and you see it is deserted. In the back room where you previously filled up the turkey baster with the filthy water to spike Naranja's drink, there is a keg of 'Coffin Shooter' which you can pour into the ship in a bottle.


Upon heading out of the back room, Olivia comes out of the side room and says that she also wants to come with you back to El Marrow. The Sea Bees are all gone from the dockyard and there is still nothing down at the Lighthouse so don't bother going down that way.

Now head down to Toto. He is soundly asleep. Open up the small cupboard on the wall where you will find a small bottle of liquid nitrogen.

You cannot go across to where the cat races are being held as the draw bridge no longer works.

You need to give Glottis the 'Coffin Shooter' drink you have. Manny convinces Glottis that it is Lumbago Lemonade. After necking the drink, Glottis asks where he can get some more. He goes into the kitchen and drinks the entire keg. Talk to Glottis again and this makes him vomit up all of the 'Lumbago Lemonade' onto the floor where the dominoes are. Use the liquid nitrogen to freeze over the ground. Walk over to the back of the car and press 'U' to diffuse the bomb.


--------------------

Cutscene to Glottis driving back to the same place Salvador Limones dropped Manny off outside of El Marrow after walking through the tunnel. Speaking of Salvador Limones, his men pick Manny and his companions up and take you down to the bunker. Salvador says that he is close to a breakthrough against Hector LeMans, but just as he is about to explain what he was going to do, he gets interrupted by one of his men who was shot by LeMans to break news to Salvador that their mission has been compromised. The spy was found out.

--------------------

Pick up the arm off of the remains of the man who just sprouted, and then pick the photo out of the bin that Salvador threw away before leaving the bunker. Look at the screen next to Eva, and you find the camera of Salvador's spy still working. On the screen, Eva introduces you to Bowlsley, 'The Florist' - Botanical weapons expert for Hector LeMans.

Remember how Salvador wrote to you saying that the carrier pigeons can deliver messages to people just by seeing their photo? Give the letter from Hector LeMans to the carrier pigeon and then show it the photo of the spy who just got shot by LeMans. The pigeon gets to its destination but is ultimately gobbled up by one of Hector LeMans's carrier pigeons. Nonetheless, the message still gets to Bowlsley.

He reacts badly to this and decides to take all of his chemicals with him and run away!

Head out to the right of the bunker and continue down the path until you find Glottis. There are two paths you can take now. Go with where you saw Bowlsley run, so take the path down the right hand side (just behind the Bone Wagon). Follow the path the whole way round until you go into the big pipe on the top right of the screen. However, you can't go down this path (maze) until you find a light of sorts to help guide you through it.

Go up the ladder on the left of the Bone Wagon then. You emerge onto a hallway where there is another ladder on the far left hand side of the screen, and a doorway into the casino on the right hand side. I would advise going up the ladder before going into the casino. You find two characters dressed in costume. Pick up the coffee jug on the side and walk over to the two individuals. Once they both have coffee, walk down the stairs and you overhear that one of them plans to buy a Number Nine ticket off of Hector LeMans. If you talk to them, all they say is that there are no more parts in the play available for audition.


Now head downstairs and go into the casino. However, you still need a costume to disguise yourself before Manny can go out onto the streets of El Marrow.

Head back up the ladder then, pick up the coffee mug again and walk past the two characters in costume and press 'U' with the ladder behind them. Go over to the right of the ladder and pour the coffee on the characters down below. This melts one of their make up and they both run off. Head back down the ladder and go into the changing room door on the right hand side. You get the chance to become a Thunder Boy in the 'Johnny Thunder' show. You get put in make up.


Now you have your disguise to go out onto the streets of El Marrow. Head downstairs and into the casino. Now you are on the casino floor. Walk to the left, you find the maintenance man from the DOD office you met when you put the balloons full of packaging foam down the tubes. He says the lift goes straight to LeMans's office and that only special clientel have the chance to go up.

Go on to the main casino floor where you will see Chowchilla Charlie winning a lot of money, as well as the agent who Salvador chopped the body off of earlier that evening. The agent says that none of the machines are safe from the LSA. The woman with Chowchilla Charlie is Meche. You need to talk to her twice to make sure she knows that it is Manny underneath that makeup. She gives you a sheet to cover Chowchilla Charlie with.


You can use the slot machine to the left of Chowchilla Charlie but after a couple of tries, you see that it seems unbeatable. It doesn't pay out even when you have three of a kind. So, to pass this part of the game, you need three things in the order they are in below:

1) 3 of a kind on the machine to the left of Chowchilla Charlie

2) To cover Chowchilla Charlie in the sheet

3) Talk to the LSA Agent and tell him to crank Chowchilla Charlie's machine.

Once the LSA Agent has moved all the images to that of Hector LeMans, Chowchilla Charlie has won jackpot! He goes into the changing room and changes into the robe that Meche gave to him to wear to the party. Head into the changing room and dress in Chowchilla Charlie's clothes. Somehow, his clothes seem to fit Manny perfectly. Now all you need is a weapon of sorts..


Head back up backstage upstairs. Go to where you poured the coffee on the two characters and go towards the screen until you reach this screen.

Once here, put the detached bone arm into the snow grinder and pull the chord next to the mechanism. You see the bone doesn't break down at all. Pick up the snow grinder / bone arm combo and put it into your inventory. Climb down the ladder and go back the casino. You find out that the bone grinder is not much use in trying to get into the elevator. So go back to where Glottis is and use the bone grinder on the green chemical substance on the floor. This turns the bones into a crystalised / coral colour.


Head down the path you previously couldn't go down because you didn't have a light. Use the bone crusher to find a small group of the ground chemical substance dropped by Bowlsley. Manny and Glottis drive down the path until they are met by an giant alligator. Drive towards the alligator until you can reach up onto the ledge to the right. To get the car at the right height just get the controller out and press 'U' to lift the car's suspension.

Walk down the ledge until you get to the end. The alligator will tail you rather than Glottis. So, when he turns to look at you, take the controller out again and put the car suspension down so it traps the alligators tail.

Go down the ladder. Walk to the right and you will come to a florist shop. Enter it.


You see Bowlsley cowering behind the counter. No matter how much you try talking to him, he just repeats what you say and doesn't give you anything. You need something to prove you are not Hector LeMans. Above the door is an urchin of sorts. Get your scythe out and cut it off. You get asked to leave, but re-enter and the bell goes. Bowlsley believes it to be a new customer so you ask for a gun and he gives you one straight away, as well as some sprouting chemicals to go with it!


Glottis drives you back to where Bowlsley dropped the first droplets of chemicals. So head back into the casino. Talk to the maintenance guy on guard who asks you 'one simple question':

How old was Hector LeMans when he stole his first dollar?

Now I don't know if it was a lucky guess or the maintenance guy didn't know the right answer, but I selected 8 years old.

You get allowed to go up to his office.

If you go to the right of where you exit the elevator (where you can see the tops of two people's heads), you meet Celso Flores, Manny's first customer from the very start of the game! Talk to Celso. It seems he doesn't recognise Manny in his makeup so talk to him about how the tickets are a scam. However, Celso thinks Manny is just trying to do reverse psychology on him. In turn, convince him of your story and about how you think they should not have to go through such peril. Celso agrees to LeMans's deal and they go into his office to chat.

If you try walk towards his office, a cutscene ensues where LeMans comes out and proposes you with a job opportunity by showing Manny to his old office in the DOD block. Upon hearing the offer, Manny reveals his real identity but before Manny can shoot LeMans with the sprouter gun, a messenger flies through the window and Manny shoots it instead. LeMans seems to have got away through holding onto the ankle of the giant, lit up model resting above the DOD office. However, the suitcase goes onto the opposite rooftop, and as the mechanical leg breaks under the added pressure, LeMans falls to the ground.

Walk around the side until you get to the roof. Unfortunately, you can't walk up the ladder until you make the other leg stretch across to the other roof. So, in turn, walk down to the bottom right of the screen and onto the ledge where you see the gargoyle being used as a structural support.


Take out the can of sprouting chemicals and pour it on the concrete just behind the gargoyle. This makes the concrete break away once the plants grow within it. The whole structure collapses. Now walk up the tall ladder on top of the roof. Once up there, Manny slides down the structure and across to the other roof.


 --------------------

Cutscene to Manny giving Meche a golden ticket for the Number Nine. Upon reaching the ticket desk, Meche gets attacked by another one of LeMans's messengers. Glottis holds onto the messenger whilst Manny gets in a getaway car. However, it appears you have been taken hostage by a double agent. She seems to have killed Salvador and all that is left of him is his head. You get taken to what looks like a graveyard of sprouted dead.

--------------------

Manny gets told to 'scat' or just get out of sight. To the left of the hill is a water container used to keep all the plants alive - as Manny said, as a memorial or as trophies?

Manny confronts Hector once more - seems like he survived the fall alright! He uncovers what he knows about Hector's cynical plan to steal all the Double-N tickets from innocent souls, pretend to sell them, but keep them all for himself in a desperate attempt to get out of the Land of the Dead. Instead of confessing to this crime, Hector predictably shoots Manny. Manny stumbles out of the greenhouse and falls to the ground some way away from it wriving in agony.

Use the liquid nitrogen to freeze the sprouting process and save Manny. Now head back to the car and talk to Salvador's head in the back of the car. You find that the key to the trunk of the car (where there is a gun) is somewhere in the meadow with the rest of his body. The conversation gets cut short by Olivia. She picks up Salvador's skull and starts asking him what he said to Manny. Salvador refused to tell her and instead spat the remnants of the sprouting substance in her face, ultimately sprouting Olivia as well.

Open up the case behind the car. You will find Manny's scythe in there. Along with this, a ticket will hop out and rest on Salvador's wreath.

Now go find the key to open the boot of the car. Remember how Salvador's ticket was drawn to his head? Pick up the ticket and walk around the greenhouse until you reach the other side. The ticket will start flapping about when you are near the body. Once you are near enough, it will float down and find a resting place. Manny gets his scythe out and cuts the grass - freeing Salvador's body. Search his body and pick up the key to the trunk


Go back to the car and open the trunk. If you try going through the doors of the greenhouse, Manny won't let you. You need to find a way to make Hector finish all of his ammo. When looking around, trying to use or pick up as many things as you can, you notice that the water tank supplies the flowers inside the greenhouse, where Hector LeMans is. So, you have to find a way to sabotage the water supply...

You guessed it, get your gun out and shoot the water tanks. I didn't think this would work initially as I didn't think it would penetrate through the water tanks but it just covers the tank and pollutes the water.

You hear the screams of Hector from the greenhouse. Go up there. Just as you are about to open the door, Hector's body explodes.

-------------------

Cutscene to the Number Nine train with Manny, Meche and Glottis on board. You reach the end of the road and have to say your goodbyes to Glottis who isn't going to go with you. Cue emotional, romantic scenes between Manny and Meche. Glottis and his little minions wave farewell to 'the best boss ever'.

The End!

So there we have it, the end of another one of my Gaming Walkthroughs on GuardianGamerOfTheGalaxy! I hope you enjoyed playing Grim Fandango as much as I have done and hope you stop by for my next walkthrough - that of Escape From Monkey Island - another one of LucasArts finest creations. Til we meet again my friends, til we meet again :)

Jonathan Whitehead